Anyone can be "the family chef". You just need good recipes and techniques! Chef Amy Fothergill shares her best recipes with you for quick and easy dishes with an emphasis on gluten-free.

Get information here about her cookbook, The Warm Kitchen: Gluten-Free Recipes Anyone Can Make and Everyone Will Love.

Saturday, August 28, 2010

Homemade chicken broth recipe

Often, when I see chef's on TV saying, "Oh, just make your own chicken broth; it's so easy", I think, do they have soccer games, birthday parties and laundry to do? But every once in a while, like after I have a rotisserie chicken, I will make my own broth. When it's all done, I realize it is worth it once in a while for two reasons: flavor and cost.

The flavor of freshly made chicken broth really can't compare to anything in a carton. It can be used to make chicken or bean soup, risotto, quinoa, rice or gravy. As I type, the house has a delicious smell of chicken wafting through it.

The other big advantage of homemade broth is that it's so economical. Earlier in the week, I brought home a $10 all-natural, no antibiotics rotisserie chicken. After 20 minutes of cooling, I removed all of the meat. I used the breast for 4 sandwiches over the next 2 days and the rest of the meat for a delicious chicken stew. I had leftover meat that we nibbled on the day after. I saved the carcass and bones to make the broth later. The veggies were cheap and I really look at the bones as being almost free since often they are thrown out anyway.

If you are looking to save some money or get a terrific broth, do like our moms did and make your own once in a while. You'll be glad you did.

Homemade Chicken Broth

1 chicken carcass (or bones from breast, leg and thigh)
Water to just cover carcass (I used about 12 cups)
2-3 tsp sea salt
1 tsp peppercorns (if you use ground pepper, use 1/2 tsp but your broth will have specks)
2 carrots, peeled and chopped into 3-4 pieces
2 celery ribs, chopped into 3-4 pieces
1/2 onion, cut into 3-4 chunks
1 bay leaf (I didn't have one this time but I do prefer to use it; I suppose it makes it optional)

Place all ingredients in a large stock pot on the stove and cover. Heat to medium and cover. Bring to a boil and then lower to a simmer. Cook about 2 hours. Cool 1 hour. Pour through strainer.

Yield 3 qts (or about 3 containers for which you pay at least $2 each)

Wednesday, August 11, 2010

Polenta lasagna with roasted veggies and gorgonzola recipe

This went so quickly, there are no other pictures!

When I'm asked to create a recipe, I often have what I call a vision of a dish. I know it should work because I've done something similar before and I'm generally good at putting flavors together.

For a dish for the CUESA Ferry Plaza Farmer's Market Food Wise booth (Tuesdays at 12:30), the only requirement is to use something from the Tuesday Farmer's Market. That picture is from last month when I served a delicious strawberry tart.

In the summer, there's such a nice variety of vegetables from which to choose, it is a hard decision. Initially I was going to do a Polenta topped with Roasted Vegetables but it would be hard to serve in little cups. Then I thought to put the vegetables between the polenta to make it more of a lasagna. I've made something like this before, layering it with bleu cheese and sun-dried tomatoes.

However, there's nothing like a strong cheese like gorgonzola with roasted vegetables so that became my inspiration. With Cow Girl Creamery located inside of the Ferry Building, the choice was easy. If you don't have access to a creamy gorgonzola or bleu, use any cheese that you like. As we were walking around the market, the basil looked so nice I thought to incorporate that as well. If you don't have fresh basil you can either skip it or use pesto.

Although I had tasted each of the components (an absolute must in cooking), after serving a tray of it, I realized I hadn't tried it all together. I was so happily surprised! I expected it to be good but it was really good. When we ran out at 45 minutes later, I knew it was a hit. People liked the fact that it was also vegetarian and gluten-free.

As always, I encourage you to try something new. Someone asked if you could use pre-made polenta. The look on my face must have been priceless. If you've never made polenta before I encourage you to try it. Follow the instructions below and you will see how simple it really is. And notice I don't label this dish with summer veggies. You can make it all year round. Enjoy!

Polenta Lasagna with Roasted Veggies and Creamy Gorgonzola

3-4 cups assorted vegetables, chopped in bite size pieces, for example: onion, pepper, zucchini, fennel, broccoli, cauliflower, grape or cherry tomatoes (keep whole), eggplant, sweet potatoes, etc.
1-2 Tbl olive oil
1 tsp Salt
1/4 tsp pepper
Seasonings like thyme, rosemary, basil, oregano, and herbs de Provence (1/4 - 1/2 tsp of each)
2 cloves or minced fresh garlic

1. Pre-heat oven to 375ºF.

2. Place veggies on a bowl with oil and seasonings and toss. Taste one of the vegetables, for example zucchini, to make sure it's seasoned well.

3. Place in roasting pan and bake about 15-20 minutes or until softened and golden, stirring once. Taste one of the vegetables to make sure they are done.

Polenta and Lasagna Assembly
4 cups water
1 tsp salt
1 c polenta
1/2 c grated Italian cheese like Parmesan or Peccorino Romano
1/2 c milk or broth (vegetable or chicken)
2-3 Tbl unsalted butter
1/4 tsp ground pepper, 1/2 tsp garlic powder, couple of pinches of crushed red pepper.

Other ingredients: 8 oz creamy gorgonzola or bleu cheese
2-3 thinly sliced tomatoes (patted dry)
Few basil leaves, torn into pieces
Few pinches of salt
1/4 c grated parm cheese

1. Bring water to a boil in a medium to large pot. Add salt. While water is boiling, slowly add polenta in a steady stream, whisking constantly. Lower heat.

2. Add cheese, milk, butter and seasonings. Simmer until thickened, whisking occasionally. If bubbling, lower the heat; polenta will be very hot and can burn you.

3. Continue to cook for about 15-20 minutes or until thick and pulling away from the sides. Taste for seasoning and adjust if necessary. If the polenta tastes flat, add more salt, garlic powder, crushed red pepper and parmesan cheese.

4. Pour half into a greased baking pan, no larger than 13"x 9", and spread with a spatula to make flat. Top with roasted vegetables and the gorgonzola or bleu cheese. Spread remaining polenta on top. Top with tomato slices, basil pieces and sprinkle salt on top.

5. Bake in a 375F oven for 25 minutes. Add more cheese. Bake an additional 5-10 minutes. Let rest for 5 minutes or more before cutting.

Wednesday, August 4, 2010

Gluten-free Margherita Pizza recipe

That's me, serving the GF Pizza while everyone waits patiently

Last month, I taught a Gluten-Free Baking class. It always gives me pleasure to see people get excited about good tasting food. I think this is especially the case with gluten-free because there is a lot gluten-free food out there that isn't good.

For this recipe, once you make the dough, the rest is easy. And now that it's summer with so many wonderful tomatoes and fresh basil, you can make this dish any night of the week. There are three things that I do think are important:
  • Pre-cook the crust for 5 minutes
  • Use tomato slices that aren't too juicy
  • Remove some of the moisture from the fresh mozzarella slices
Since the recipe is straight forward, let's get right to it. I have to say, it was one of my best creations. I hope you'll try it.

Gluten-Free Margherita Pizza

1 gluten-free pizza crust (recipe here)
2-3 fresh tomatoes, sliced (cut in half first, squeeze a little to remove some juice, then slice)
1 lb fresh mozzarella, cut into slices and placed on a plate with either a paper towel or kitchen towel to absorb moisture
2-3 tsp olive oil
1/2 tsp sea salt
Handful of fresh basil

1. Prepare crust. If you don't have a pizza stone, use a round baking sheet. Make sure to use the parchment paper and the cornmeal. Also, if you prefer a thinner crust, divide the dough between two sheets.

2. After the dough has pre-cooked for 5 minutes, remove from the oven. First, layer the tomatoes on the dough, leaving space for the crust. Top with cheese and then drizzle olive oil all over. Sprinkle salt and then place basil leaves on top.

3. Bake another 7-10 minutes or until crust is brown and cheese is melted. For a crispier crust, slide dough directly onto oven rack for the last 3 minutes (place a baking sheet under to "catch" the cornmeal).

4. Cool about 3 minutes and then enjoy. You are welcome.

Tuesday, August 3, 2010

Easy Black Bean Soup recipe

Soups are economical and easy to prepare. Generally, the way I make it is the same. Sauté the vegetables with seasonings. Add broth and other pantry ingredients. Bring to a boil and then simmer. My soup recipes all have a pattern. Once you learn how to make soup, it’s so easy to change a few ingredients and have a new dish.

For example, instead of black beans, you can use white beans and change the seasonings from Mexican to Italian (use oregano instead of cumin, coriander and chile powder). Instead of cilantro, add chopped parlsey; instead of tortilla strips, add pasta; and instead of cheddar cheese, add grated Parmesan. It's all about the process.

I love this soup because it just tastes so good and it's easy to make. If you need an overview on soups, check my prior blog post "How to Make Soup" in which I go over some basics. Most of the ingredients can be kept in the pantry with the exception of the carrots and celery (and really, these keep a long time in the fridge).

The next time you find yourself saying, "what should I make for dinner?", why not try this recipe? You will be happy you did!

Black Bean Soup

Bean Soup Base:
2 tsp olive oil
1/2 onion, chopped
2 carrots, peeled and chopped
2 celery stalks, peeled and chopped
Seasonings: 1 Tbl mild chili powder
1/4 tsp ground pepper, 1/2 tsp each cumin, coriander, and oregano
1 c or 8 oz chopped ham (optional)

2 cloves chopped garlic
1/2 tsp salt
2 cans of black beans, drained and rinsed or 4 cups of cooked beans
1 qt chicken or vegetable broth

Optional Ingredients: 1 15-ounce can diced tomatoes, undrained

Toppings: 1/2 c shredded cheddar, 2-3 Tbl chopped cilantro, 1/2 c sour cream, crushed tortilla chips

1. Heat pot to medium first. Add oil, then add onion, carrot, celery, and seasonings. Stir once and cook, stirring only occasionally, making sure vegetables don’t burn but that they are browning.

2. After a few minutes, add the ham and stir once. Continue cooking until ham has browned and vegetables are soft.

3. Add garlic and salt and cook for 1 more minute.

4. Add beans and broth. If you want something more like chili, add the can of diced tomatoes.

5. Simmer about 30 minutes. Top each bowl with cheddar, cilantro, sour cream and tortilla strips.

Gluten-Free Tip: Make sure the broth you use is gluten-free. Also, you might need to check the beans with the manufacturer to make sure they were not processed on machines that process foods with gluten. Everything else should be gluten-free as long as it has been handled appropriately, without any cross contamination issues (e.g. cutting the vegetables on a cutting board which has been used to cut regular bread).

How to Make Soup

For some people, soup can be a hard dish to make. My mother used to say if you didn't season it correctly, it would taste like dishwater (true, very true). So, this is where The Family Chef comes in.

I like to make soup for my family for a number of reasons: it's easy, economical, usually nutritious and tastes good. Just follow these easy steps and you are on your way.


Cook the Mirepoix (seen above)
A mirepoix is a French term and in it’s basic form is a combination of chopped onions, celery and carrots. It’s the base for many soups as well as stocks which are use for gravies and sauces. Try to keep these three vegetables on hand so that making a soup is a breeze any night of the week. When I make soup, I also add chopped ham or a ham hock for a wonderful smoky flavor. If you are vegetarian or don't have it, it's ok to leave it out.

When you cook the mirepoix, add the seasonings except salt and fresh garlic. Salt will extract the moisture and make the veggies sweat. I prefer a saute for nice browning. If the veggies are getting very dry, add a pinch of salt but no more. Otherwise, add the salt with the broth and then at the end if it's needed (or tastes like dishwater).

Fresh garlic will brown and turn bitter if overcooked. Add it right before you add the liquid.


Add the Main Ingredients
Once the mirepoix is cooked, the next step is easy; add broth and your main ingredients.

You can add any type of broth like chicken, vegetable or beef. I like two brands: Pacific organic chicken broth or Better Than Bouillon; the latter is a paste that is mixed with water. It enables you to make exactly the amount needed.

For the main ingredient, I usually use beans or legumes. I use canned beans when I'm in a hurry; lentils and split peas only take 30 minutes to cook. Dried beans can be cooked in 2-3 hours if you plan ahead (check this article on how to do it).

Other ingredients I usually add are diced, canned tomatoes, with their juice.

Simmer Away
Once all of your ingredients are in the pot, bring the soup to a boil and then lower to a simmer. For a thicker soup, leave the cover off. For a more brothy soup, keep covered but make sure the heat is turned to low so it's simmering and not boiling.

Cooking Grains in Soup
Towards the end of the cooking process, I like to add some type of grain to make it a complete meal. Unless I have leftovers in the fridge, I cook rice, quinoa or pasta in the soup itself. Here are some tips:
  1. Add broth or extra water to the soup, usually 2-3 times the amount of water as the grain. Return to a simmer.
  2. Add dry pasta, rice or a grain to the soup. For example, I would add 2 cups of extra water and 1 cup of pasta.
  3. Cook an additional 10-35 minutes. For example, brown rice or barley would need the longest cooking time.
So, that's it. Pretty simple right? There are many of you out there that want a recipe. Never fear, my Black Bean Soup will be posted next. Enjoy!

Thursday, July 1, 2010

Healthy school lunch ideas for kids

Ham "sushi" roll-ups with a little bit of everything
(Here's my review of the eco friendly lunch containers I love to pack lunches in.)

The other day, when I was making lunch for my 2 children, aged 6 and 4, I started thinking about healthy lunches since people often ask me for ideas. That day, I made turkey sandwiches on whole wheat bread, and packed cheese, blueberries, and a combination of cucumbers, carrots and string beans (that’s what was in the fridge). It made me realize something: a healthy lunch is an extension of a healthy diet.

An easy way to think about a healthy meal is a combination of carbohydrates, protein, vegetables and fruit. Keep the sugar to a minimum, especially refined, to make sure your little ones feel good. Once in a while, I’ll add a granola or cereal bar, maybe a sugared yogurt or muffins (cookies and sweets are discouraged at the pre-school and school where both of them attend). The point is, I don’t give them three sugary things in one lunch. Instead, I keep other choices stocked in the fridge and pantry.

I almost always give them whole wheat bread. The best advice I can give you is to read the label. Look for bread that has at least 3 grams or more of fiber in it. Bread should not have a lot of sugar or any high fructose corn syrup. A good rule of thumb is that you should recognize the ingredients. There are lots of options out there which aren’t all dry and crumbly. You can also use whole wheat or spelt (another form of wheat) wraps for sandwiches. When I make ham roll-ups made from wheat lavash with avocado or lettuce, my son calls it ham sushi. It's a new favorite. For kids who want something different, try brown rice sushi or some type of hot meal served over brown rice.

For protein, it involves planning at the grocery store. If your children go to school everyday, you can buy turkey on Sunday and serve it Monday and Wednesday. Make chicken for dinner Monday night and serve that on Tuesday. Thursday can be avocado and cheese and maybe hard boiled eggs or egg salad on Friday. There’s always ham and roast beef to make sandwiches as well. Try to buy natural sandwich meat that does not contain nitrates or added solutions. Here's an interesting discussion if you want more information.

For other sources of protein, use natural peanut, almond or cashew butters or those that are low sugar with no hydrogenated oils. If you are avoiding nuts, try sunflower butter. Jelly or jam should be low sugar and should not contain unnatural sweeteners (i.e. sugar-free). There’s nothing wrong with peanut butter and jelly but it’s better if it’s not laden with sugar.

You can also serve dips like hummus or bean dip which can be made into sandwiches or served with vegetables. My daughter likes tofu; some times I send that in her lunch.

If you are looking for ideas for something other than sandwiches, look to your leftovers. Chicken and rice, macaroni and cheese, soup, and chili are all good options. Just make sure you can keep the hot food hot. Keep in mind that foods which are in some type of sauce or liquid will stay hotter longer.

Balanced Lunches
Are trying to get a little of everything in a lunch? Start with making a lunch that has these four components: Protein, Carbohydrate, Fruit and a Veggie. Here are examples of each.

  • Protein: turkey, chicken, ham, black beans, garbanzo beans, tofu
  • Carbohydrate (always use whole grain): bread, tortillas, crackers, bagel, pretzels
  • Fruit (use seasonal): apples, bananas, dried fruit, berries, melon
  • Veggie (raw or cooked): carrot, celery, peas, string beans, cucumber slices, avocado or guacamole, lettuce, broccoli, pepper slices

Non-Sandwiches
If your children don't like sandwiches or you want some ideas for your own lunches, try these ideas.
  • Cooked sushi (California roll or shrimp)
  • Burrito (wheat tortilla, black beans and jack cheese)
  • Tortilla rolled up w/various fillings like hummus and veggies, cheese, turkey, depending on what's on hand. Roll it up very tightly, then slice into kid-sized pieces
  • Non-sandwiches like turkey rolled and cut into finger food size with a side of whole wheat pita bread wedges
  • Egg salad served with whole wheat crackers
  • Hummus sandwich with arugula or lettuce
  • Avocado and cheese sandwich (add tomato and/or lettuce as well)
  • Crustless quiche/frittata

Snacks for Lunches or After School
For kids that go all day (camp or school), you often have to pack a lunch. Here are some ideas for those snacks or even for after school.

  • Low-sugar muffins
  • Plain yogurt with added fruit or granola
  • Unsweetened applesauce (consider buying a big jar and placing into small reusable containers; much more economical and better for the environment)
  • Orange slices
  • Assorted berries (blueberries, raspberries and strawberries) in a reusable container
  • Veggies like bell pepper, cherry tomatoes, cucumber, broccoli and carrot with small container of ranch dressing, hummus or mayo for dipping
  • String cheese or slices of cheese (less expensive and less waste)
  • Bean dip & corn chips
  • Edamame beans
  • 1/2 sandwich
If you want your children to be healthy eaters, involve them in the process. Ask them which colors they want to eat today. Giving them choices enables them to be part of the decision. Be careful to label foods as good or bad. It becomes more of a balance between “some time” foods and “most of the time” foods. Before you wonder about what to pack for lunch, make sure your cupboard and fridge are stocked with plenty of healthy choices.

Check this blog as well as my website for more healthy, easy recipes.

Tuesday, June 29, 2010

My new favorite eco friendly lunch box

***Read below for discount information***


I love this lunch: a little bit of everything and Crunchfuls for dessert!

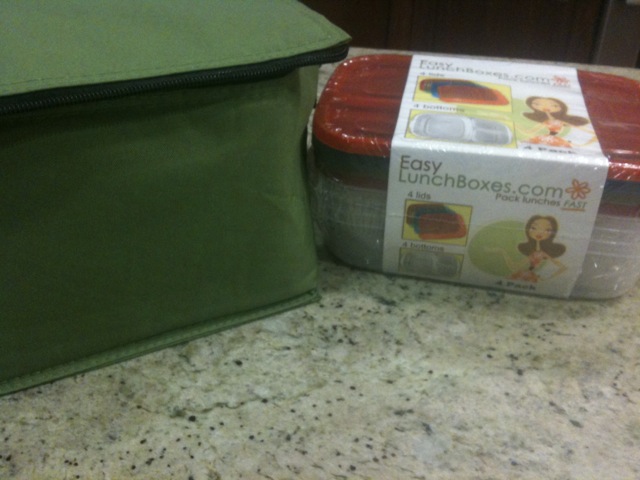
It's funny all of the things that social media can do for us. I have met some amazing people that would not have crossed my path otherwise. Such is the case for Easy Lunchboxes, my newest find. These are a great eco-friendly lunch box system that makes snack and lunch prep a snap.

The Story
One day, while checking out twitter, I found a link to a new lunch box system that I hadn't seen before, Easy Lunch Boxes. Something about it (especially since it was labeled as a green lunch box) made me interested in learning more. I am trying to get away from what I view as "bad" plastics in my quest to be a somewhat green mom. I've tried stainless steel products but some are heavy or don't fit everything that's needed for lunch. I usually end up with a combination of stainless steel and plastic containers. Besides the worry of the plastic leaching into the food, just trying to keep all of those containers organized is a chore. The last consideration is where the lunch will be sitting. Some of the systems looked good on paper but I realized that a rectangular shape that can sit upright would be best to fit on the classroom shelves. It also needs to fit in a back pack. Who knew there would be all of these things to think about just to make lunch for a 5 year old?!

Why I like the Easy Lunch Box System
Well, I liked the idea of a safe plastic (these are FDA approved, contain no BPA, phthalates, lead, vinyl, or PVC and are safe for dishwasher and microwave) for many reasons; besides the aforementioned, I find the plastic easy to clean and lightweight. The little compartments are great so that I can put all of the different parts of my children's lunch in one place. The lunch system comes with 4 containers and 4 lids so searching for parts doesn't take any more time. If you have access to a microwave (maybe not for the kids), these containers can be used for reheating food as well.

I did learn that if you want to send a yogurt snack, that compartment should be covered with either wax or plastic wrap. The containers fit but are not tight. This is good for little hands to be able to open but not good if you have something liquidy and the lunch bag moves from side to side or is placed on it's side. Still, I'm fine with a work around.

All in all, I've been very happy with this new lunch box system. The owner of the company is a mother of three so she really gets it. She designed these with her family in mind. Kelly has also been very responsive with any of my questions or concerns. I truly appreciate that.

How to Buy and Discount
So whether you are going back to school like an old pro or starting with your first day in August or September, check out the Easy Lunch Box system as an option. If you plan on buying one, use FamilyChef (case sensitive) for a 10% discount good until 9/6/10!

The bags come in all sorts of colors as well. I'll have to get purple for my daughter when she starts kindergarten. The bags fit two plastic containers or one container and room for a water bottle. When I send two containers, I attached the water bottle to the outside with a carabiner (the rock climbing hook which pushes open on one side).

Healthy Lunch Ideas
If you are looking for some ideas for lunches and snacks, check this article. I try to make sure that my kids get protein, carbs, fruit and a veggie. I may not do this everyday but it's a goal. Check the ingredients of what you serve and be careful not to include too many sugary or processed foods. Their teacher will appreciate that!

My gluten-free snack box. There aren't many options when I'm out.
Check out this article about the Inspired Cookie here.