Anyone can be "the family chef". You just need good recipes and techniques! Chef Amy Fothergill shares her best recipes with you for quick and easy dishes with an emphasis on gluten-free.

Get information here about her cookbook, The Warm Kitchen: Gluten-Free Recipes Anyone Can Make and Everyone Will Love.

Thursday, November 15, 2012

Gluten-free Chocolate Crackle Cookies


I made these for many years with regular flour. When I began eating gluten-free, I thought it would be too hard to convert the recipe. Actually, it wasn't hard at all. The result is a delicious, chocolately, crisp on the outside-gooey on the inside cookie! It's easy to make these dairy-free as well. Just make sure to dip them in soy, coconut or almond milk!

I hope you will give it a try.


Gluten-Free Chocolate Crackle Cookies
Makes 25-30 cookies

1/4 cup unsalted butter or shortening (for dairy-free), softened (1/2 stick)
3 squares (3 ounces) unsweetened chocolate

1 cup Amy's Gluten-Free flour blend
1 teaspoon baking powder
1/4 teaspoon salt
1/4 teaspoon xanthan gum

1 cup + 3 Tablespoons organic white sugar
2 large eggs
1 teaspoon vanilla


  1. Melt butter and chocolate either in the microwave or in a bowl over a pot of simmering water. If you melt it in the microwave, heat on high for 30 seconds at a time, stirring in between until melted. Do not overheat. Transfer to a large bowl and cool.
  2. In a medium bowl, combine flour blend, baking powder, salt and xanthan gum. 
  3. In the bowl with the chocolate, add 1 cup of sugar, eggs, and vanilla and mix well. Stir in flour mix until blended. Cover and chill at least 1 1/2 hours or until dough is firm enough to shape.
  4. Preheat oven to 300F. Prepare 2-3 cookies sheets with parchment paper or silicone baking mats.
  5. Portion pieces of the dough which are slightly larger than a tablespoon. Roll into a ball and then roll in the remaining sugar. The dough gets sticky. 
  6. Place 2” apart on the sheets. Bake 18-20 minutes, rotating pans in the oven halfway through. Bake until crackled on top and firm to touch.
  7. Place cookie sheet on wire rack and cool at least 10 minutes before removing. Using a spatula, transfer cookies to the rack. Cool cookies completely.


Your Gluten-Free Holiday Meal

This could be your holiday dinner plate!

If you think that eating gluten-free means your holiday meal will be anything less than fantastic, you need this mini e-cookbook that I just published. Whether you are looking to include a single gluten-free dish or makeover your whole holiday meal, this is the book for you. 

Feel good this holiday season but not just because your meal is gluten-free...help raise money for the Hurricane Sandy relief fund AND get a great e-cookbook. For every cookbook sold, $1 will be donated to The American Red Cross. You can also choose to buy just the book without the donation.

To get more details and to purchase/download click here.

Learn how to make a gluten-free pie crust with step-by-step instructions. Instead of a pie, try an easier version; the galette.


Make your own  "custom" cranberry sauce; it's so easy!

Need ideas for leftovers? There's a whole section. Use the pie crust recipe to make a delicious pot pie.


Monday, November 12, 2012

San Francisco Foodies: Open Casting Call with Soy Vay


Thank you to Soy Vay for providing complimentary samples for my review.

Guess what? I just found out that one of my favorite marinades has a gluten-free option. If you aren't gluten-free, you really should try the Soy Vay sauces. I used to love them. Use it for chicken skewers or beef skirt steak. Yum. 

If you are a foodie or just want to have some fun, here's something that might be of interest to you. Do you know what’s good in San Francisco cuisine? Do your friends constantly look to you for restaurant recommendations? Then Soy Vay, the delicious sauces and marinades company with a unique history, is looking for you! Starting this month, Soy Vay is headed out on a cross-country adventure to find one lucky local to be the face of a new web series – ‘Flavor Underground’ – to help discover the best neighborhood restaurants and chefs. First up— the city of San Francisco.

Beginning today, food lovers in San Francisco, Oakland and Berkeley are invited to create a short video review of their favorite neighborhood restaurant and upload it to www.flavorunderground.com any time before November 30th, 2012. The top five applicants will be called back for a screen test and then one Bay Area foodie will be announced as the San Francisco host of ‘Flavor Underground.’

Why not give it a shot??

Tuesday, October 9, 2012

Roasted Red Cabbage


This is in the category of "things you should not assume your kids won't like". A friend of mine (thank you Kristen!) served it at dinner a few years ago and I was amazed that my then 5 year old daughter loved it. I really was shocked! However, my then 7 year old ate it but I'm not sure he loved it. I'm okay with that.

There's really no recipe; it's more of a method. Here you go:
Preheat oven to 375F. If you have convection, use it for this dish.
I use about 1/2 of a cabbage for our family of 4. Many grocery stores will cut a cabbage in half for you if you don't think you will use the rest.
Remove the white core from the middle. Cut the cabbage into wedges. 
Drizzle with olive oil. Season with salt and pepper. 
Roast about 12-15 minutes or until you can smell the cabbage. Cabbage should be tender with a little browning. Serve as is.

Monday, October 8, 2012

Pumpkin Pie Muffins (gluten-free and regular)


There's not much to say about these delicious muffins! This recipe will be in my cookbook. One of the testers said "My daughter said they tasted like pumpkin pie. And my little guy couldn’t help himself from stealing fistfuls of the ones we were trying to save for his daddy."

You can easily call them a cupcake if you add buttercream or cream cheese frosting (as seen above). Since many of my recipes started out "regular" and then I converted them to gluten-free, I thought it would be easiest to provide options for either.

Here are a few more tips:

  • Gather your ingredients on the counter first. Eggs are best if used at room temperature.
  • Use one bowl for dry ingredients and one bowl for wet. Measure the dry ingredients first.
  • Invest in a good 12-cup muffin tin that won't burn the bottom of your muffins. It will be worth it.
  • For easy and consistent portioning, when making muffins, use a hinged-type ice cream scoop (also known as a scooper). These can be found at restaurant supply stores in different sizes.
Enjoy!


Pumpkin Pie Muffins (regular and gluten-free)

Dry Ingredients
2 cups Amy’s Gluten-Free Flour Blend or regular all-purpose flour
2 tsp baking powder
1/2 tsp baking soda
1/2 tsp salt
1/2 tsp xanthan gum (omit if not making gluten-free)
1 rounded tsp ground cinnamon
1/2 tsp ground ginger
1/2 tsp ground nutmeg
1/4 tsp ground cloves

Wet Ingredients
2 large eggs
1 can (15 to 16 ounces) pumpkin puree
1/3 cup melted butter or vegetable oil
1/2 cup milk or milk substitute
1/2 -3/4 cup organic sugar or other natural sweetener
1 tsp vanilla
Optional: 1/2 to 3/4 cup chopped pecans and/or raisins

1. Preheat oven to 350ยบ F. Line muffin pans with paper cups or grease tins generously.
2. In a large bowl, mix the dry ingredients.
3. In another medium bowl, mix the eggs. Add the pumpkin, butter or oil, milk, sugar, and vanilla.
4. Add the wet ingredients to the dry ingredients and mix gently. Add nuts if using.
5. Portion out regular or mini muffins into the cups, filling 2/3 full. Bake regular muffins for 20-25 minutes or mini muffins for 12-16 minutes.

Tip: Always test muffins 1-2 minutes before the recommended time in case your oven is hotter than normal. For regular muffins, insert a toothpick into the center of a muffin. When it comes out dry with some crumbs, it is done.
For gluten-free muffins, instead of using a toothpick to test for doneness, press your finger into the muffin. When it springs back, it’s done. If it leaves an indentation, continue to bake and test in 1-2 minute intervals.

6. Once done, allow muffins to cool for about 2-3 minutes and then remove from the pan.

Saturday, September 8, 2012

Gluten-Free Orange Chicken

This gluten-free orange chicken was born out of a desire to make my daughter happy. When my husband had the traditional gluten-containing version while we were out for lunch one day, my daughter looked on in envy. Surely, I believed—after years of adapting recipes for my gluten-sensitive family—the same taste could be achieved without the offending wheat protein.
I found an orange chicken recipe on Food.com and made a few changes in the ingredients as well as the technique until I came up with the following. I served it to the family along with some brown rice and previously steamed green beans.
When my son gave my cooking a round of applause after eating it, I knew I must have done something right. I tried to put in a lot of details which should make it easy for you. Hopefully your family will be just as pleased!

-->
Gluten-Free Orange Chicken                                                  
2 eggs
1 1/2 teaspoons sea or kosher salt
1/4 teaspoon white pepper
1 tablespoon vegetable oil

1/2 cup cornstarch + 1 tablespoon cornstarch
1/4 cup sushi flour or white rice flour
2 lbs boneless skinless chicken, cut into bite sized pieces
1/4 cup oil for frying

Orange Sauce
2 tablespoons gluten-free soy sauce
2 tablespoons water
5 tablespoons sugar
5 tablespoons white vinegar

2 teaspoons oil for high heat like peanut or safflower
1 tablespoon ginger, minced
1 teaspoon garlic, minced
1 tablespoon rice wine or sherry (not vinegar)

1/2 teaspoon sesame oil
Zest of 1 orange
Optional: hot chili oil or crushed red chili peppers

 1.  In a large bowl, mix eggs, salt, pepper, and 1 tablespoon of oil. 
 2.  In a small bowl, combine 1/2 cup of cornstarch and sushi or white rice flour. 
 3.  Add the flour mixture to the egg mixture and mix well. This is the batter. 
 4. Add the chicken pieces, stirring to coat. I like to use my hands for this step. Make sure to clean your hands before and after.


5.     Place 1 tablespoon of oil in the wok and heat to medium-high. 
6.    Working in batches, carefully add about 1/3 to 1/4 of the chicken. Cook until golden brown on each side. You do not have to fully cook the chicken as it will finish cooking in the sauce but make sure the pieces are browned. Place pieces on a large plate or tray while you finish cooking the remainder of the chicken.


7.  Make orange sauce in a small bowl and set aside.
8.  Once all of the chicken is cooked, carefully (since it’s hot) wipe out wok if needed. Heat 15 seconds over medium-high heat. Add 2 teaspoons of oil. Add ginger and garlic and stir-fry until fragrant, about 10 seconds. Add rice wine and stir 5 seconds. Add orange sauce and bring to boil.
9.  Add cooked chicken, stirring until well mixed. Bring to a simmer, stirring occasionally. Cook about 3 minutes.


      10.  In a small bowl, mix 1 tablespoon of cold water with the remaining 1 tablespoon of cornstarch. Add to the chicken, stirring. This will thicken the sauce. Continue simmering about 2-3 minutes. Add more water or soy sauce if the sauce becomes too thick.
       11. Stir in sesame oil and orange zest. Cook for 1 more minute and serve. If you like spicy food, add hot chili oil and/or crushed red chili flakes.


Saturday, September 1, 2012

Citizen Chef meals are great for busy people


When I first heard about Citizen Chef, I loved the concept: a meal which is ready to cook (just add the protein), fresh, healthy, and easy. You are eating in 15 minutes. Sounds like my kind of dinner! The bonus is that some of the meals are gluten-free, which is not easy to find.

The nice folks at Citizen Chef sent me two of their products to try out; Thai Sesame and Hawaiian BBQ stir frys. I brought them to a friend's house along with some chicken (you can use any protein) to give it a whirl. Being the family chef, I thought it would make sense to try them out with a group of kids along with adults. Here are my notes:

Ingredients: Both packages contained the same ingredients for the stir fry which consisted of onion, snap peas, carrots, and red cabbage. My kids are funny; they don't like cooked carrots. So, instead, I offered them some uncooked veggies. Problem solved. I loved the combination of vegetables along with the bright colors. Everything cooked up really nicely. If I could change anything, I would suggest slightly thinner or smaller pieces of onion.

Sauce: The adults loved the sauces, especially the Thai Sesame. The base was a coconut cream which was really flavorful and very fresh. This one was too spicy for the kids but perfect for us. The Hawaiian BBQ (a bit sweeter), in my opinion, would be better for kids but that night (maybe due to some peer pressure), the kids preferred it plain. I really don't mind that as this does not mean making two meals. It just requires removing some of the protein and/or veggies before simmering in the sauce. It was not a big deal at all.

Rice: The brown rice is really an instant-style rice. It was easy, had a good texture, and was perfect with the meal.


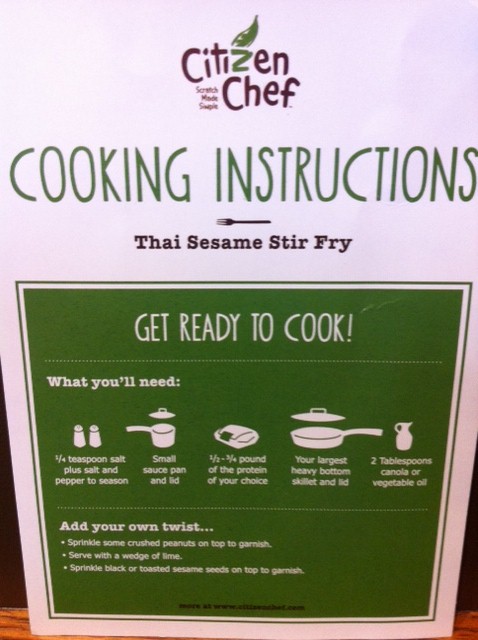
Instructions: The instructions could not have been easier but I got a little confused the first time around. I didn't turn over the card to see the cooking instructions at first but when I did, it was obvious.

The other side has detailed instructions with a timeline. At first I didn't realize it was a set of steps:
1) Cook rice.
2) Saute protein.
3) Steam and simmer.

I think that's just how my brain works. Now, it's obvious. My only other suggestion is that you probably only need 1 tablespoon of oil, not 2. I always go lighter. This dish is well suited for a wok which has a cover.

I encourage you to give it a try. You can buy these ready-to-cook meals at the following locations. Right now, there's also a $3 coupon offer on the home page.