Anyone can be "the family chef". You just need good recipes and techniques! Chef Amy Fothergill shares her best recipes with you for quick and easy dishes with an emphasis on gluten-free.

Get information here about her cookbook, The Warm Kitchen: Gluten-Free Recipes Anyone Can Make and Everyone Will Love.
Showing posts with label desserts. Show all posts

Saturday, April 19, 2014

Tastefully Simple provides true to its name


True to its name, Tastefully Simple provides easy-to-prepare foods that require only two items and three steps (or fewer) to prepare. They recently launched a line of gluten-free mixes that are both tasty and simple!

Thank you to Tastefully Simple for providing samples for me to try. My opinions are my own. 

Below you'll find the company's product descriptions followed by my pictures. The mixes were all super easy to assemble and yielded great results. One thing you should be aware of is that the products were not made in a dedicated gluten-free facility and some of the products contain dairy. I made adjustments as needed. 

Gluten-free beer bread: calls for one egg and gluten-free beer or sparkling water. I used gf beer; it was really easy to make. It was a bit on the sweeter side and we found it better toasted. I would have liked it with melted cheese or pesto spread. My kids didn't love but then again, they are not beer connoisseurs! It would be good for appetizers with something else in my opinion.
Makes 13 servings. 13.9 ounce pouch. Kosher.


Gluten-free fudgy brownie mix: loaded with real chunks of fudge. Simply add butter (or oil) and eggs. Again, very easy and tasty. I made this and brought to a function. No one knew it was gf. 
Makes 16 servings. 18.8 ounce pouch. Kosher.

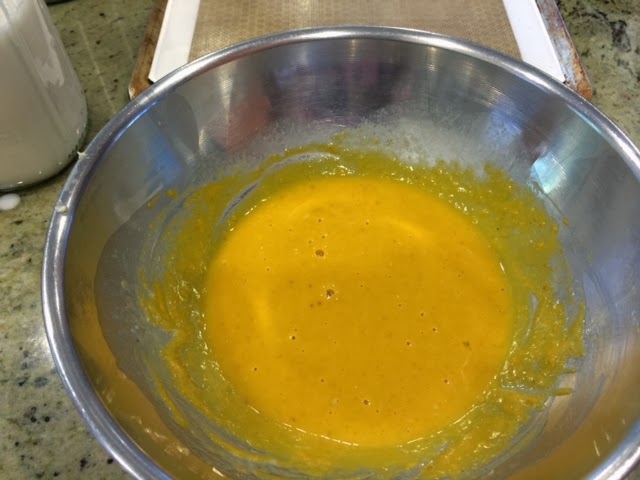
Gluten-free cinnamon apple cake mix: glorious cinnamon-spiced goodness. Just add eggs and apples. Although this cake took a bit more effort to make it was absolutely our favorite hands down. I shared some with a friend and they were quite enthusiastic. I added some chopped nuts along with the apples. I would make this again in a heartbeat!
Serves 9. 16.5 ounces. Kosher.


Gluten-free vanilla bean pound cake mix: flecks of vanilla bean. Just add water and butter. Yes, this was an indulgence and one that my dairy-free daughter could not have. I brought this to a function for sharing and everyone loved it. I would say this runs a close second to the apple spice cake above. I would like it better if there was no dairy.
Serves 8. 14.8 oz. Kosher. 


Depending upon your level of sensitivity (remember, they are manufactured in a plant that also uses wheat), these gluten-free mixes are both delicious and easy to make. If you are interested in possibly being entered for a give-away, leave a comment!


Monday, February 10, 2014

Gluten-Free Rolled Sugar Cookies


Whether or not you are a kid, a rolled sugar cookie in some fun shape with colored sprinkles always seems fun. Rolled sugar cookies can be made any time during the year. Don't be intimidated when you those fancy looking pre-made cookies in the store; this recipe is easy and delicious (and might even taste better!).

The original recipe came from www.food.com, called “Gluten Free Dutch Sugar Cookies." I’ve made some adjustments to it as well. This is one exception where you need to use the flours listed instead of my mix; it makes it much lighter.

You can find this recipe and more like it in my gluten-free cookbook, The Warm Kitchen.  Here's what one enthusiastic fan wrote about the recipe:

I wanted to report that based on Rebecca's experience, I tried Amy's recipe as well. They were fabulous! The dough was very easy to work with and did not stick to the work surface or crack. The cookies when baked did not crumble or break. My kids like to frost the cookies with a simple icing of powdered sugar, water, and vanilla and the sprinkle with colored sugars. The cookies did not break when the kids did their decorating. But, best of all, the cookies taste wonderful! My husband couldn't even tell that they are GF! Amy, I am a fan!

-Alison P

Yield 3-4 dozen, depending upon the size of the cookie cutter


1 cup white rice flour

1/2 cup tapioca flour

1 cup cornstarch

1 teaspoon baking powder

2 ½ teaspoons xanthan gum

1 teaspoon kosher salt


1 cup white sugar

1/2 cup vegetable shortening

1/2 cup unsalted butter (use all shortening for dairy-free)

1 large egg

2 teaspoons vanilla extract


1/4 cup potato starch, for kneading

Sprinkles for decorating


1. Preheat oven to 350°F. Prepare 2-3 baking sheets by lining with parchment paper or silicone baking mats.

2. In a small bowl, mix together dry ingredients (first 6 ingredients).

3. In the bowl of a stand mixer fitted with the paddle attachment, cream together sugar, butter and shortening. Add the egg and vanilla and mix briefly. Add the dry ingredients, and mix to combine.

4. Take the bowl out of the mixer. Add 1/4 cup of the potato starch and mix with your hands until it is well combined and not too sticky. Add more if necessary and use the rest for rolling. If the dough seems very sticky, place in the fridge for 10 minutes.

5. Divide the dough in half. Place some potato starch on the counter and put dough on top. Place more potato starch on top and roll out to about 1/8 inch thickness. Use more starch so the dough does not stick to the rolling pin or counter. Make sure the dough thickness is consistent so the cookies bake evenly.

6. Using cookie cutters, cut into shapes and place on pan. Optionally, decorate with sprinkles before baking.

7. Re-use the scraps and roll out again, but try not to handle too much.

8. Bake for about 8-10 minutes, rotating once. Cool for at least 3 minutes before removing from the pan.  Cool on wire racks.

Monday, January 6, 2014

All But Gluten™ Review

A plate of gluten-free goodies I brought to an event; easy for me and truly gluten-free for those that need it


Thank you to All But Gluten™ for providing complimentary samples for my review.


For the gluten-free crowd, a new product line is emerging from Weston Bakeries Limited that promises to “rekindle your love of baked goods.” 

With a nice range of offerings from white and whole grain loaves, pizza dough, brownies, muffins and macaroons, All But Gluten™ further demonstrates how gluten-free options have really hit the mainstream.

Product samples sent to me from All But Gluten™
The Canadian-based company boasts that the products in this soon-to-be national line are even available in the Safeway bakery aisle. Have a quick need for some gluten-free goodies for a party or some bread for your kids’ PB&J sandwiches? They’re not tucked away in the freezer section, it’s right there next to the standard bakery fare. Some might argue that this matter of convenience makes it the greatest thing since, well, sliced bread.

My kids liked the bread, especially for “egg in the hole” or toast and the cinnamon raisin loaf worked very well for French toast (this recipe is in my cookbook as well).

To make "egg in the hole", using a small glass or cup, cut a hole in the center of the bread. Heat a non-stick pan to medium or medium high. Either butter both sides of the bread or put olive oil (better for those with a dairy intolerance) in the pan. Place the piece of bread with the hole into the pan (you can also grill the circle if there's room). Crack egg on the counter and then immediately place in the center of the bread. Lower the heat slightly if the egg is sizzling very high. Season with salt and pepper. Once egg is brown on the bottom and the white is almost all set, add some more olive oil to the pan, carefully turn over and cook the other side. We like ours over medium (a bit runny) so cook based on your taste.

My kids' favorite breakfast: Egg in the Hole!

In addition to the convenience, it’s reassuring to know that all of their gluten-free products are made in a dedicated facility so there is no risk of cross-contamination. The products are also enriched with vitamins and minerals and made without dairy as well. Some of the ingredients used are not the most natural/healthful but that is often the case with many gluten-containing products as well. I preferred the whole grain bread over the white.

Need something on the go? How about one of their muffins along with some fruits or veggies and nuts. I would consider it more of a treat but everyone once in a while, that's ok.

The bottom line is it’s great that so many companies are hopping on board with providing gluten-free products. The more that’s offered, the more options non-gluten eaters (whether by choice or necessity) will have and more included they will feel as general consumers. 


The All But Gluten™ products are now premiering in the San Francisco Bay Area and can be found in most Safeway grocery stores. If you do not live in the Bay Area, keep an eye out for them soon.


Wednesday, October 30, 2013

Gluten-Free Pumpkin Scones


-->  


I don't know about you but I often look at things longingly in bakeries. Lately it's been pumpkin almost anything that I can't eat because it's always filled with gluten. Well I finally found a recipe that I was able to translate really well to gluten-free. I made mine dairy-free and it was just as delicious. The recipe includes the variation (it's pretty straight forward).
 

As with any recipe, make it a few times and it won't be hard. The key is to make sure the cold butter or vegetable shortening is incorporated well into the dry ingredients. You can do this either with a food processor (my favorite), a pastry blender (handheld tool) or two knives. This dish is great for breakfast or as a treat with a cup of tea or coffee.

Makes approximately 12-14 medium sized scones
 
6 tablespoons butter or vegetable shortening, cut into chunks

Dry Ingredients:
1 ½ cups Amy’s Gluten-Free Flour Blend
½ cup almond meal (or all gluten-free flour)
Scant ½ cup brown sugar
1 tablespoon baking powder
¾ teaspoon xanthan gum
½ teaspoon sea or kosher salt
Heaping ½ teaspoon ground cinnamon
Heaping ¼ teaspoon ground nutmeg
¼ teaspoon ground ginger
1/8 teaspoon ground cloves
3 tablespoons half and half or 2 ½ tablespoons almond or soy milk + ½ tablespoon vegetable oil
1 large egg
1/2 cup canned pumpkin

Egg Wash:
1 large egg
1 tablespoon milk or milk substitute
Coarse sugar (for example, turbinado)                                    


Sugar Glaze Ingredients:
½ cup powdered sugar
¾ to 1 tablespoon milk or milk substitute

1. Preheat oven to 400˚F.  Prepare a baking sheet with a silicone baking mat or parchment paper.
2. Place butter or shortening in the freezer for about 5 minutes. Measure the dry ingredients while it chills.
3. Combine the dry ingredients in the bowl of a food processor. Pulse about 5-10 times until dry ingredients are mixed well.
4. In a medium to large bowl, beat the eggs first, then add the milk and pumpkin. Set aside.
5. To the bowl of the food processor, add the chilled butter or shortening. Pulse 20-30 seconds or until mixture looks like grated parmesan cheese. You can also use a pastry blender to blend the butter or shortening with the dry ingredients.
6. Gently mix the dry ingredients into the wet ingredients with a spatula. Form into a ball.
7. Place some gluten-free flour on a clean counter. Place the dough on the counter and pat into a rectangle about 1” thick.
8. Use a knife or pizza cutter to cut into triangles. Transfer to the baking sheet.
9. To make the egg wash, mix egg and milk or milk substitute in a small bowl. Brush each scone with the wash. Sprinkle each scone with coarse sugar.
10. Place in oven and bake about 12-15 minutes or until scones are golden brown. Scones should be crisp on the outside and soft on the inside.
11. After about 3 minutes, transfer to a wire rack.
12. Once cool, prepare the sugar glaze. In a small bowl, whisk together the powdered sugar and milk until smooth.  If it’s too runny, add more sugar.  If too thick, add a little more milk until reaching desired consistency.  Drizzle the glaze over the top of each cooled scone and enjoy. 


Friday, June 14, 2013

How to Make Chocolate Hazelnut Spread, aka "Nutella"

Everyone has different reasons for making food (like Nutella) at home which they can buy off of the shelf; it might be economic or for health reasons. Since the first time I tried Nutella, I never had the desire to make it. But, when the day came that my darling dairy-free daughter could no longer partake because of the milk in it, I considered it.

I had seen a recipe for the hazelnut spread in my high-powered blender but assumed it was hard. I decided one day to take a look and was very happy to find that 1. it was not that hard (1 hour start to finish with time in between when you don't have to do anything), 2. I had most of the ingredients in my cabinet with the exception of the hazelnuts (aka filberts), and 3. the recipe did not have any dairy in it. Ok, time to shift the paradigm again.

So here is what I found: the amount of time and effort it took was less than (from helping with third grade math, I believe I could have said "<") the 2 cups of deliciousness that was produced. Here's the recipe along with some tips. Enjoy and make it for someone special or just yourself! Uhm, "enjoy" doesn't even begin to describe this experience.

Chocolate Hazelnut Spread
Makes 2 cups

1 cup hazelnuts or filberts
1/4-1/3 cup coconut oil, melted
Optional: 1 teaspoon or more of mild oil like sunflower or safflower, if needed
1/4 cup cocoa powder
1 teaspoon vanilla extract
1 cup or a little more confectioner's sugar

Notes:

  • You could probably also use blanched almonds instead of hazelnuts. I did not try this but saw a recipe.
  • Add a few extra hazelnuts when measuring to account for those that might not shed their skin and for those that end up in your mouth.
  • Do not use "virgin" coconut oil unless you want a coconut flavor; the non-virgin is tasteless.
  • The original recipe called for only 1/4 cup of coconut oil but the blender started making an awful sound so I added more until it began to form a paste. I also added some oil. The result is a thinner paste but I liked that.
  • Use a high quality cocoa powder that isn't Dutch-process, meaning it has not been alkanized. I used Ghirardelli.
  • I tasted the spread and decided to add more confectioner's sugar. Start with 1 cup and then decide for yourself.


1. Pre-heat oven to 350F. Place nuts on a baking sheet and bake 8-10 minutes, shaking the pan once to make sure they toast evenly. Bake until the skins darken.
2. Cool the hazelnuts. Wrap them in a clean kitchen towel and rub towel back and forth to remove most of the skins. Discard skins (careful, it's messy).
3. Add melted (but not hot) coconut oil and hazelnuts to a high-powered blender (e.g. BlendTec, Vitamix) and secure lid. Press "Speed Up" to speed 1 for 15 seconds then increase to speed 9 for a full cycle. Add more coconut oil or vegetable oil if you think the nuts are not forming a proper paste. Scrape down with a spatula and move hazelnut meal toward the center.
4. Press "Speed Up" to speed 5 and run a full cycle. Scrape down the sides and move the meal toward the center. Repeat two more times.
5. Add remaining ingredients. Press "Speed Up" to speed 5 (or lower), scraping down the sides. Taste and add more sugar if necessary. The "spread" might be liquidy and warm at first but will firm up and cool down. I placed mine in a 2 cup mason jar and let it come to room temp before placing in the fridge.
6. Store in an airtight container in the fridge for 4-6 weeks. Bring to room temp before serving or take a small amount out and microwave for 5 seconds to soften.

Monday, January 7, 2013

Amy's Gluten-free flour blend


When I started my adventure in gluten-free baking, one thing that stressed me out was the amount of flours in a recipe. It was so off-putting, sometimes I did not want to bake. I was soon rescued by a friend, Amy Andrews of Amy's Food Room, who gave me her recipe for a flour blend that she had created. Over the years, I changed it to what you see below. I am very grateful to her for getting me started on the road to successful gluten-free baking.

One of the differentiators of my recipes from others you may see is the concept of using one blend for almost everything. This flour blend can be your new best friend. I mix between 6 and 9 cups at a time (1 to 1.5 times the recipe below). I use it for bread, waffles, pancakes, cupcakes, cookies, etc. with few exceptions. I almost always use it in other people's recipes.

One thing that I noticed with many recipes and pre-mixed flour blends was that these have a lot of “white” flour, for example white rice, potato and tapioca starch. My blend still has more nutritional value with the brown rice and millet; it's 2/3 whole grain. The upside is that it is light enough to create a baked good with excellent texture.

Another distinction from other flour blends is that I do not add xanthan gum to my mix for three reasons. I find that for most cakes, you only need 1/2 teaspoon xanthan gum for every 2 cups of flour but for cookies, you need more like 1 teaspoon for every 2 cups of flour. So it's better to mix according to the recipe. Another reason is that the xanthan gum, which lasts over a year, should be refrigerated. I don't refrigerate my flour mix for reasons of space and finding it is not necessary. Lastly, if I'm only mixing a small amount of xanthan gum with a large amount of flour, I would worry it would not get properly distributed. These are my views. If you are worried about the cost and not using it in a year, find a friend to split the bag. So, this is the secret to my success. I hope it helps.

Mix together and keep in an air tight container:
3 cups brown rice flour
1 cup tapioca flour or starch
1 cup potato starch (not flour)
1 cup millet flour

Here's to happy baking. Let me know if you like it.

Tip: When you measure the flour into the large container, it's ok to put in a little more or less of a flour. I have found it's ok to estimate. However, when you measure flour for a recipe, fill the cup with about half of the flour then scoop flour on top, enough so that it is heaping. Use a flat edged knife to level the cup to measure exactly.

Monday, December 17, 2012

Santa hat cupcakes

Santa Hat Cupcakes courtesy of Lauryn Cohen

I know you might think I'm clever, but really, I'm not. Full credit goes to Lauryn Cohen, aka Bella Baker, who came up with this cute concept. Lauren is the queen of sweet and is known for her uniquely creative treats and crafts. She recently launched a holiday baking guide (entitled Sweet Gifts Holiday Baking and Crafting Guide- available nationwide) filled with innovative and delicious recipes for the holidays.

Lauryn was nice enough to share one of her creations with The Family Chef. In this recipe, she calls for a red velvet cupcake (you will find a gluten-free, no-dye recipe in my upcoming cookbook). You can always use a basic vanilla (regular or gluten-free).

Here is her technique for making super cute holiday cupcakes for your friends or family.

Santa Hats

Santa Baby! This cupcake is topped with your favorite buttercream frosting and uses an upside-down ice cream cone, sprinkles, and a white gumball to create Santa’s signature cap. Here's what you will need:

  • 12  sugar ice cream cones (regular or gluten-free)
  •  red candy melts
  •  red sanding sugar sprinkles
  • 12  white gumballs
  •  white dot sprinkles or white sanding sugar sprinkles 

Assembly
With an offset spatula, frost a thin layer of buttercream icing onto the top of each cupcake. If you have a strip of some fun paper, wrap it around the cupcake.

Cut the pointy tops off of the ice cream cones (I might try it with kitchen scissors).

In a microwave-safe bowl, melt the red candy melts in the microwave in 30-second intervals, stirring vigorously with a spoon between intervals, until they are completely melted. They should take 2 or 3 intervals to melt completely.

To decorate each cupcake, place your index and middle finger inside the large opening of the ice cream cone for stability and then carefully, using a spoon, coat the entire outside of the ice cream cone with the melted red candy melts. Immediately coat the entire cone in red sanding sugar. Gently slide your fingers out of the cone and stand the cone on a sheet of parchment paper (or a silicone baking mat).

Dab a small amount of the melted candy onto a gumball and place it on the top of the ice cream cone. Allow to dry completely. Place the Santa Hat onto the cupcake.

Finally, sprinkle the white dot sprinkles or white sanding sugar over the icing that is peeking out around the edge of the ice cream cone.

Friday, December 7, 2012

Gluten-Free Dairy-Free oatmeal chocolate chip cookie recipe


 I was experimenting with gluten-free oatmeal cookies a few months ago and created this recipe based on a combination of a few other recipes I had found. Initially, I made it with butter which meant my daughter couldn’t have them. However, the last time I made chocolate chip cookies, she wasn’t so interested.

I still thought it would be good to make sure these tasted just as good without as with butter. Multiple Organics was kind enough to send me a sample bag of chocolate chips. I thought this would be the perfect opportunity to try them. Besides being organic, kosher, and fair-trade, these very tasty chips are also allergen-free. I was almost surprised at how good they were! They are produced in a dedicated facility free of major allergens including milk, eggs, fish, shellfish, tree nuts, wheat, peanuts, soybeans, and sesame.  

It was a surprise to me when my daughter came over to the cooling rack and grabbed one enthusiastically. Her comment was “Mama! Yummy”! Even my husband who does not have much of a sweet tooth grabbed a second cookie and commented “These are GOOD”.

You can be the judge. See my comments for each ingredient. I really hope you try them. These are worth it and make almost 4 dozen!


Gluten-Free Dairy-Free Oatmeal Chocolate Chip Cookies

Makes 40-48 cookies

1 1/2 cups Amy's Gluten-Free Flour Blend

1/2 cup almond meal (for nut allergies, use the same amount of the above flour mix in place of the
almond meal)

1 teaspoon cinnamon (optional)       

1 teaspoon baking soda                                                                            

1 teaspoon xanthan gum                                                                   

1/2 teaspoon kosher salt

1/2 cup white sugar                

1/2 cup brown Sugar

1 cup butter substitute (I like Spectrum butter flavored shortening), softened

2 large eggs

1 teaspoon vanilla

1 1/2 cups gluten-free rolled oats

1/2 cup organic shredded coconut, unsweetened

1 cup organic dairy-free chocolate chips

1. Preheat oven to 350°F. Prepare baking sheets with parchment paper or silicone baking mats.

2. In a medium bowl, mix flour blend, almond, cinnamon, baking soda, xanthan gum, and salt.

3. In a large bowl with a hand-held mixer or a stand mixer fitted with the paddle, cream the butter
substitute and sugars for 1 minute. Add the eggs and vanilla and mix until well combined,
scraping the sides.

4. Add the flour mixture and mix until combined. Add oats and coconut. Mix until combined. Add
chocolate chips and mix on low until just combined.

5. Drop rounded tablespoons of dough onto baking sheets, pressing down slightly.

6. Bake for 10 – 12 minutes, or until golden brown. Cool 2 minutes and then transfer to a wire
rack.

Sunday, November 18, 2012

Gluten-Free Mexican Wedding Cookies

I'm in trouble...big trouble. Because the holiday season, as far as I'm concerned, has kicked off. That means lots of baking for me. I love to experiment and see what I can convert to gluten-free. Some times I am successful and some times not. But when I am, I need to get these treats out of the house! My neighbors really like me.

I've said this before, if I see a picture of a certain food, I get a little obsessed; in a good way. I must have seen some of these delectable treats some where and decided I needed a good gluten-free version. I tried them last year but they fell apart so I was feeling a bit deflated. I had some time today to play thus, I started looking through recipes.

I found this one from the Gluten-Free Canteen. I loved the ingredients but wanted to use my blend and change the directions a bit. I also wanted to try to make it dairy-free (which I did successfully). However, use butter if you can. When I'm making them for friends and not my daughter, I will make them with butter. That could be bad. I might start sampling more!

Happy holidays! I hope you enjoy them. Remember, you can buy "Your Gluten-Free Holiday Meal" from my website. I pride myself in writing good recipes which explain how to do things. I hope it helps.


Gluten Free Mexican Wedding Cookies
Makes about 40 cookies


2 cups +1 tablespoon Amy’s Gluten Free Flour Blend
¼ cup almond flour or meal
½ teaspoon xanthan gum


1/2 heaping cup powdered sugar + about 1 cup for dusting cookies later
1 cup unsalted butter, room temperature, or vegetable shortening
1 large egg

¾ cup finely chopped pecans or walnuts


  1. Preheat oven to 350°F. Prepare 2-3 cookie sheets by placing parchment paper or silicone baking mats on top.
  2. In a small bowl, mix the flour, almond flour and xanthan gum. Set aside.
  3. Sift 1/2 heaping cup of powdered sugar into the bowl which you will use to cream the sugar and butter or shortening, either a large bowl or the bowl of a stand up mixer. Sifting is an important step so don't skip it. You can use a mesh strainer to sift the sugar. Add the butter or shortening to the bowl.
  4. With a stand up or handheld mixer, blend the sugar and butter or shortening until creamy. Add egg and mix until well blended.
  5. Add the flour mixture. With a rubber spatula or wooden spoon, mix until combined. Add the chopped nuts and mix. If the dough is very sticky, add a little more flour but not too much.
  6. Roll into approximately 1” balls.  Place on the cookie sheets about 1” apart (I used 2 pans and then reused one of the pans; 3 in total).
  7. Bake 10 minutes in the center of the oven, rotating the pan 180 degrees once after 5 minutes. Bake until fragrant and the bottoms are light brown. Remove from oven and set aside for a few minutes.
  8. Place ½ cup of powdered sugar in a bowl. After the cookies have cooled about 3-4 minutes or until they are cool enough to handle, roll in the powdered sugar. Place on a wire rack and cool another 5-10 minutes. Roll each cookie a second time in the powdered sugar. TIP: I baked the cookies one tray at a time. While 1 batch of cookies were baking, I was rolling another batch in the sugar. It took longer but it was easier to remember which had been rolled once or twice.
  9. Cool completely and then keep in a covered container.

Thursday, November 15, 2012

Gluten-free Chocolate Crackle Cookies


I made these for many years with regular flour. When I began eating gluten-free, I thought it would be too hard to convert the recipe. Actually, it wasn't hard at all. The result is a delicious, chocolately, crisp on the outside-gooey on the inside cookie! It's easy to make these dairy-free as well. Just make sure to dip them in soy, coconut or almond milk!

I hope you will give it a try.


Gluten-Free Chocolate Crackle Cookies
Makes 25-30 cookies

1/4 cup unsalted butter or shortening (for dairy-free), softened (1/2 stick)
3 squares (3 ounces) unsweetened chocolate

1 cup Amy's Gluten-Free flour blend
1 teaspoon baking powder
1/4 teaspoon salt
1/4 teaspoon xanthan gum

1 cup + 3 Tablespoons organic white sugar
2 large eggs
1 teaspoon vanilla


  1. Melt butter and chocolate either in the microwave or in a bowl over a pot of simmering water. If you melt it in the microwave, heat on high for 30 seconds at a time, stirring in between until melted. Do not overheat. Transfer to a large bowl and cool.
  2. In a medium bowl, combine flour blend, baking powder, salt and xanthan gum. 
  3. In the bowl with the chocolate, add 1 cup of sugar, eggs, and vanilla and mix well. Stir in flour mix until blended. Cover and chill at least 1 1/2 hours or until dough is firm enough to shape.
  4. Preheat oven to 300F. Prepare 2-3 cookies sheets with parchment paper or silicone baking mats.
  5. Portion pieces of the dough which are slightly larger than a tablespoon. Roll into a ball and then roll in the remaining sugar. The dough gets sticky. 
  6. Place 2” apart on the sheets. Bake 18-20 minutes, rotating pans in the oven halfway through. Bake until crackled on top and firm to touch.
  7. Place cookie sheet on wire rack and cool at least 10 minutes before removing. Using a spatula, transfer cookies to the rack. Cool cookies completely.


Your Gluten-Free Holiday Meal

This could be your holiday dinner plate!

If you think that eating gluten-free means your holiday meal will be anything less than fantastic, you need this mini e-cookbook that I just published. Whether you are looking to include a single gluten-free dish or makeover your whole holiday meal, this is the book for you. 

Feel good this holiday season but not just because your meal is gluten-free...help raise money for the Hurricane Sandy relief fund AND get a great e-cookbook. For every cookbook sold, $1 will be donated to The American Red Cross. You can also choose to buy just the book without the donation.

To get more details and to purchase/download click here.

Learn how to make a gluten-free pie crust with step-by-step instructions. Instead of a pie, try an easier version; the galette.


Make your own  "custom" cranberry sauce; it's so easy!

Need ideas for leftovers? There's a whole section. Use the pie crust recipe to make a delicious pot pie.


Monday, October 8, 2012

Pumpkin Pie Muffins (gluten-free and regular)


There's not much to say about these delicious muffins! This recipe will be in my cookbook. One of the testers said "My daughter said they tasted like pumpkin pie. And my little guy couldn’t help himself from stealing fistfuls of the ones we were trying to save for his daddy."

You can easily call them a cupcake if you add buttercream or cream cheese frosting (as seen above). Since many of my recipes started out "regular" and then I converted them to gluten-free, I thought it would be easiest to provide options for either.

Here are a few more tips:

  • Gather your ingredients on the counter first. Eggs are best if used at room temperature.
  • Use one bowl for dry ingredients and one bowl for wet. Measure the dry ingredients first.
  • Invest in a good 12-cup muffin tin that won't burn the bottom of your muffins. It will be worth it.
  • For easy and consistent portioning, when making muffins, use a hinged-type ice cream scoop (also known as a scooper). These can be found at restaurant supply stores in different sizes.
Enjoy!


Pumpkin Pie Muffins (regular and gluten-free)

Dry Ingredients
2 cups Amy’s Gluten-Free Flour Blend or regular all-purpose flour
2 tsp baking powder
1/2 tsp baking soda
1/2 tsp salt
1/2 tsp xanthan gum (omit if not making gluten-free)
1 rounded tsp ground cinnamon
1/2 tsp ground ginger
1/2 tsp ground nutmeg
1/4 tsp ground cloves

Wet Ingredients
2 large eggs
1 can (15 to 16 ounces) pumpkin puree
1/3 cup melted butter or vegetable oil
1/2 cup milk or milk substitute
1/2 -3/4 cup organic sugar or other natural sweetener
1 tsp vanilla
Optional: 1/2 to 3/4 cup chopped pecans and/or raisins

1. Preheat oven to 350º F. Line muffin pans with paper cups or grease tins generously.
2. In a large bowl, mix the dry ingredients.
3. In another medium bowl, mix the eggs. Add the pumpkin, butter or oil, milk, sugar, and vanilla.
4. Add the wet ingredients to the dry ingredients and mix gently. Add nuts if using.
5. Portion out regular or mini muffins into the cups, filling 2/3 full. Bake regular muffins for 20-25 minutes or mini muffins for 12-16 minutes.

Tip: Always test muffins 1-2 minutes before the recommended time in case your oven is hotter than normal. For regular muffins, insert a toothpick into the center of a muffin. When it comes out dry with some crumbs, it is done.
For gluten-free muffins, instead of using a toothpick to test for doneness, press your finger into the muffin. When it springs back, it’s done. If it leaves an indentation, continue to bake and test in 1-2 minute intervals.

6. Once done, allow muffins to cool for about 2-3 minutes and then remove from the pan.

Friday, July 27, 2012

Gluten Free Chocolate Almond Cake


Gluten-Free Chocolate Almond Cake - Torta Caprese

I learned how to make this cake in Italy with Wendy Holloway from Flavor of Italy. She was so sweet to include a gluten-free recipe for me. I have since learned that this style, creamed yolks with sugar added to almond meal and folded with egg whites, is more of a technique in Italy and other areas of the Mediterranean rather than a response to creating a cake which is gluten-free.

I have adapted her recipe slightly to fit with US measurements. After making it twice, I know it will be a dessert in my repertoire. I hope you will give it a try!

Gluten-Free Chocolate Almond Cake (aka Torta Caprese)

4 ounces dark chocolate
4 ounces unsalted butter or  vegetable shortening

1 ½ cups almonds, ground fine (raw, skin on)
2 tablespoons potato starch or cornstarch
1 teaspoon baking powder
½ teaspoon sea salt (flakey) or kosher salt

5 eggs, separated
1 cup sugar
1 teaspoon vanilla

Tip: Eggs are easiest to separate when cold but whip best at room temp

1. Melt butter and chocolate. Cool. Mixture should still be liquid but not hot.
2. Preheat oven to 350F. Prepare a cake pan with non-stick spray or butter/oil and white rice flour.
3. Grind almonds finely. In a bowl, mix the almonds with potato starch, baking powder and salt.
4. In a large bowl, beat egg yolks with sugar and vanilla until thick and smooth, about 2 minutes.
5. Fold in the almond mixture and chocolate mixture to the egg yolks.
6. Clean the beaters and dry. Beat egg whites until stiff but not dry.

7. Fold in ¼ of the egg whites at a time into the chocolate mixture.
8.     Pour into pan and bake 40-45 minutes or until toothpick inserted in center comes out clean and the edges of the cake pull away from the pan. Cool slightly then remove from pan. Serve with whipped cream and fresh berries or with vanilla ice cream.


Saturday, February 18, 2012

Gluten-free Fruit and Berry Crisp Recipe

 
This recipe is so good, you will also want seconds!

What I love about this recipe is that you can make it all year round. In the summer, there is a bounty of fruit like peaches, apricots, nectarines, and all types of berries. In the winter, you can use apples, pears, and frozen fruit. The recipe is very forgiving as well. You can measure the fruit or just put enough to fill your pan. Use what's on hand and check the freezer.

I love using berries in my crisp recipe because they are so healthy. We are lucky to have Driscoll's Berries available in stores where I shop. I like that they are just down the road in Watsonville, produce tasty berries and offer a wide variety of organic products. For the crisp above, I used raspberries, blueberries, frozen peaches and fresh apple slices.

Remember, berries freeze very well so get them when they are fresh from the market, lay them flat on a cookie sheet, freeze, then transfer to a freezer-safe bag or container. The bag is a little better because you can remove the air which can cause freezer burn. If you wash your berries, make sure they are dry before freezing. I give mine a quick rinse and gently pat them with a paper towel to avoid breaking them.

I have been making this fruit crisp for a long time. When I went gluten-free, I adapted it so the whole family could enjoy it. It continues to be a favorite of my family, friends and students in my classes. It can be served as is, with ice cream or heavy cream, yogurt or, for a dairy-free ice cream, try some vanilla coconut "ice cream".

If you are concerned about the oats (some people can't even tolerate the gluten-free variety), add more gluten-free flour mix and chopped nuts. To save time, measure the crisp ingredients (except the butter) beforehand and keep it in a bowl until you are ready to bake. Instead of a store-bought dessert, why not give this one a try? I'll bet everyone will appreciate it!

Watch the how-to video here on The Family Chef You Tube channel.


Gluten-Free Fruit and Berry Crisp 

Crisp Topping:
1/2 cup Amy's gluten-free flour mix
1/3 cup gluten-free quick oats (if you can’t tolerate oats, substitute with more gluten-free flour mix and/or more chopped nuts)
1/3 cup organic white or cane sugar
1/2 teaspoon Kosher salt  (use 1/4 teaspoon of table salt)
1 teaspoon ground cinnamon
Optional: 1/2 cup chopped nuts (chop first, then measure)
6-8 Tablespoons melted unsalted butter or vegetable oil (use less if you are watching calories; more if you want a crisper topping)

Filling:
4 cups sliced, peeled and cored fruit like apples, pears, peaches, nectarines and/or blueberries, blackberries or olallieberries (use all of one or a combination)
1/3 – 1/2 cup sugar or agave nectar (use more sugar or agave if the fruit is tart or if you use more than 4 cups)
2 Tablespoons cornstarch or any other starch like tapioca or arrowroot


1.    Preheat the oven to 375F. Grease a 2 to 2-1/2 quart baking dish or deep pie dish.
2.    Make the Crisp Topping and set aside.
3.    Mix the fruit, sugar and cornstarch and toss gently. Transfer the fruit mixture to the baking dish and cover with the crisp topping, spreading evenly.
4.    Place in the oven and bake until the top is well browned and the fruit is tender when pierced with a knife, about 30-35 minutes.
5.    Serve with whipped cream or ice cream.

Monday, December 6, 2010

Gluten-free lemon almond cookie recipe

Gluten-free Lemon Almond Cookies
Notice the nice browning on the bottom. You get that from a good pan or using a silicone baking mat

I tend to over think blogging so my intent is to be short and sweet (good luck to me). Many years ago, I had a recipe for Lemon Almond Cookies. I had copied it from a magazine (specifically from Gourmet, Feb 1990) and kept it all of these years. It is hand written on a recipe card; I added my own interpretation and instructions. At Christmas, I always made these delicious, sweet and crisp cookies.

I'm not sure of the last time I made them but in recent years, with a gluten-free diet, I haven't even attempted them. This year, I just couldn't take it and decided to convert it myself. My palate is fairly fine-tuned so I'm pretty good at distinguishing flavors. These hit the mark 100%. I'd be very surprised if anyone could tell (take a number if you want to come over to try one).

Of course, the downside is taste-testing and what that means to my middle. And by taste-testing, I mean eating 3-4 a day just to make sure they are still as delicious as the last time.

So, enjoy. I'm now having some fun trying to convert old recipes to gluten-free. For those who aren't gluten-free, don't fret. The original recipe is here.

Gluten-Free Lemon Almond Cookies

1/2 c almond meal
3/4 c gluten-free flour blend
1/4 c sweet rice flour (white rice will work as well)
1/4 c cornstarch
1/4 tsp sea salt
1/2 tsp xanthan gum

1 1/2 sticks (3/4 cup) unsalted butter, softened
1 cup plus 2 tablespoons organic white sugar
1 large egg
1 1/2 tablespoons freshly grated lemon zest (use a microplane for this)

1. In a small bowl, mix flours, salt and xanthan gum.
2. In the bowl of a stand mixer, cream together the butter and 1 cup of the sugar for 2 minutes until fluffy. Scrape down the sides.
3. Beat in the egg and the zest until well blended, scraping down the sides.
4. Add the flour and mix on low until the dough is combined well. Raise the speed to medium and mix for 20 seconds. I found this helps to "gel" the xanthan gum.
5. Cover and chill for 1-2 hours.
6. Form the dough into walnut-size balls and arrange them 2 inches apart on baking sheets lined with a silicone baking mat or parchment paper.
7. Place the remaining 2 tablespoons of sugar on a plate. Dip the bottom of a moistened glass in the sugar and press down on the cookies slightly, flattening them to about 2 inches in diameter, maybe a little less. These will spread.
8. Bake the cookies in the middle of a preheated 350°F oven for 12-15 minutes, or until they are golden around the edges. Halfway through the baking time, rotate pans in the oven.
9. Allow to cool for 5 minutes then transfer them to racks.

Yield-3 dozen

Wednesday, September 15, 2010

Gluten-free banana crunch muffin recipe

Yummy gluten-free banana muffin

In case you don't know, I love the Food Network. I've been a fan for years. One of my favorite chefs is Ina Garten, The Barefoot Contessa. Someone recently passed along her recipe for Banana Crunch Muffins. I didn't try the muffin but could tell from the smell it was good.

Recently, I started my son on a gluten-free diet. Of course, I had incredible "mommy guilt" when I told him he couldn't have the muffin so I needed to figure out a way to make a version for him. With a few easy adjustments, it was straight forward. The sugar content was high for me so I made some other adjustments.

Even after cutting back the sugar, wow, these are sweet. But, I look at them as a treat, not something for everyday. The sugar could probably be cut even more, especially if the granola that's used is on the sweeter side. This would probably make an excellent banana cake as well; just lower the temp by 25 degrees and cook about 40 minutes. Enjoy!

Gluten-Free Banana Crunch Muffins (based on a recipe by Ina Garten)

3 cups gluten-free flour blend
1 1/2 tsp xanthan gum
2/3 cup white organic sugar
2/3 cup brown or raw sugar
2 tsp baking powder
1 tsp baking soda
1/2 tsp salt
1 stick (4 oz) unsalted butter, melted and cooled (or you can use all butter or all oil)
1/2 c coconut oil, melted and cooled
2 large cage free eggs
3/4 cup milk
2 teaspoons pure vanilla extract
1 cup mashed ripe bananas (2-3 bananas)
1 cup medium-diced ripe bananas (1-2 bananas)
1 cup chopped walnuts
1 cup gluten-free granola
1 cup unsweetened shredded coconut

1. Preheat the oven to 350 degrees F. Prepare 18-20 muffin tins.

2. In the bowl of a stand-up mixer fitted with a paddle attachment, mix the flour, xanthan gum, sugars, baking powder, baking soda, and salt with a whisk. Add the melted butter and coconut oil and mix for 1 minute. Combine the eggs, milk, vanilla, and mashed bananas, and add them to the flour-and-butter mixture. Scrape the bowl and blend well until the mixture comes together.

3. On low, mix in the diced bananas, walnuts, granola, and coconut into the batter. Spoon or scoop the batter into muffin tins, about 2/3 full.

4. Bake for 25 to 30 minutes, or until the tops are brown and a toothpick comes out clean. Cool slightly, remove from the pan, and serve.

Monday, May 17, 2010

Gluten-Free Biscotti

This is often how things work with me. I decide at some point that I want something. Pizza, cookies, a madeleine...and since I'm eating a gluten-free diet, I can't always go to the store to buy it. Or, maybe I can but it's not always good.

So it was, that day, when I really wanted a good biscotti. Believe it or not, I've never even made them, even with gluten! The next part of the journey began with finding the right recipe.

I wasn't in the mood for lemon pecan or orange walnut. I didn't want chocolate either. Cinnamon almond was coming to mind so that's what I decided to try to create. I used this recipe from one of my favorite bloggers, gluten-free girl, and made a few changes, including using less sugar.

The real test was in serving these little delightful treats to my non-gluten free friends. All were pleasantly surprised when I told them my little secret.

I hope you try it and know you'll like it!

Gluten-Free Cinnamon Almond Biscotti

1/2 c almond flour
1/4 c sorghum flour
1/4 c tapioca flour
1/4 c potato starch
1/4 c white rice flour
2 tsp baking powder
1 tsp xanthan gum
1/4 tsp salt
1 tsp cinnamon

8 Tbl (1 stick) unsalted butter, softened
3/4 c sugar (I used 1/2 c brown sugar and 1/4 c brown rice syrup)
2 large eggs
1/2 c sliced almonds, not toasted

1. Preheat the oven to 350°F. Place a piece of parchment paper or a Silpat on a baking sheet.

2. Add the dry ingredients into a bowl (flours, baking powder, salt, xanthan gum, and cinnamon). Using a whisk, mix until well blended. If necessary, use your fingers to break up any big pieces of almond flour or baking powder.

3. Put the butter in a stand mixer. Using the paddle attachment, beat the butter for about a minute and then pour in the sugar. Cream the butter and sugar together until the batter is smooth, about 3 minutes. Add the eggs one at a time until the mixture is fluffy.

4. With the mixture on low, add the dry ingredients in 3 batches. Turn the speed to medium and mix for 1 minute. This helps to "gel" the xanthan gum and hold the dough together. Lower the speed and add the almonds until just mixed.

5. The dough will be sticky. You can either use an ice cream scoop to place the dough on the baking sheet in two long rows or use a greased spatula. Pat down and form each into it's own long log with a spatula. It should be a little flat as well. And yes, it will be sticky.

6. Bake the biscotti for 16-18 minutes, turning around once. Bake until golden and somewhat firm, but still somewhat soft, pushing the top center of the cookie. This is the best way to tell whether it is done. Once done, take the baking sheet out of the oven and allow the biscotti to cool for 10 minutes. Carefully, move them to a cooling rack and leave for at least 30 minutes to firm up.

7. When the biscotti are entirely cool to the touch, place one log on a cutting board. With a serrated knife, cut consistent slices, about 1/2" wide, depending upon how you like your cookies. Move them back onto the baking sheet, bottom side down and repeat with the other log.

8. Heat oven to 350°F again. Once oven is hot, place biscotti back into oven. Bake until they are browned and crunchy, about 16-20 minutes.

Cool them entirely before attempting to eat. Ok, try one if you are drooling but they are better once cooled! Store in an airtight container.

Makes 2-3 dozen biscotti.

Tuesday, February 9, 2010

Gluten-free chocolate chip cookie recipe

Who would have thought that you could use the term "gluten-free" and "tasty chocolate chip cookie" in the same sentence? Up until recently, I didn't think you could either! Even now, as I write this article, I just want to take a bite out of one of those cookies. Lucky for me, I put a bunch in the freezer so I actually could do that!

I use Twitter to get the latest gluten-free news and see what's happening with those whom I follow. I found a link to a link to a great recipe for chocolate chip cookies, apparently from Alton Brown. I admire him as he always looks at the science of cooking and baking. But, if I'm not mistaken, I don't think he's been baking gluten-free for 3 years. When you have been doing this a while, you know what to look for and can make adjustments accordingly.

Although the original recipe is his, here's my take on it. I hope it yields you with happy eaters.

Gluten-free Chocolate Chip Cookies

8 ounces unsalted butter
2 cups brown rice flour
1/4 cup cornstarch
2 Tbl tapioca flour
1/2 teaspoon xanthan gum
1 teaspoon kosher salt
1 teaspoon baking soda
1/2 c sugar
3/4 c light brown sugar
1 whole egg
1 egg yolk
2 Tbl whole milk
1 1/2 teaspoons vanilla extract
12 ounces semisweet chocolate chips (I like Guittard which are gluten-free)

1. Melt the butter in a heavy-bottom medium saucepan over low heat or in a glass measuring cup in the microwave. Once melted, pour into the bowl of a stand mixer. Allow to cool slightly.

2. In a medium bowl, sift together the rice flour, cornstarch, tapioca flour, xanthan gum, salt and baking soda. Set aside.

3. Add both of the sugars to the bowl with the butter and using the paddle attachment, cream together on medium speed for 1 minute. Add the whole egg, egg yolk, milk and vanilla extract and mix until well combined. Slowly incorporate the flour mixture until thoroughly combined. Add the chocolate chips and stir to combine.

4. Chill the dough in the refrigerator until firm, approximately 1 hour.


5. Preheat the oven to 375ºF.


6. Scoop out rounded tablespoons and place on parchment-lined or silicone baking mat-lined sheets. Arrange about 9 to 12 cookies per sheet.

7. Bake for 16-18 minutes, rotating the pans after 8 minutes for even baking. Make sure cookies are browned. Remove from the oven and cool the cookies on the pans for 3 minutes. Carefully, move the cookies to a wire rack and cool completely. Store cooked cookies in an airtight container or in the freezer in a freezer-safe bag.