Anyone can be "the family chef". You just need good recipes and techniques! Chef Amy Fothergill shares her best recipes with you for quick and easy dishes with an emphasis on gluten-free.

Get information here about her cookbook, The Warm Kitchen: Gluten-Free Recipes Anyone Can Make and Everyone Will Love.
Showing posts with label snacks. Show all posts

Wednesday, April 2, 2014

The best gluten-free chicken tenders

Without a doubt, these are better than anything I or my children have ever had in a restaurant! Well, in my humble opinion, that is. When I make these, I make a double batch. We use half for the meal and I either freeze the rest or use it for lunches or leftovers.

You can use this recipe for fish or almost any other protein, even tofu! For our family, I use a dairy substitute like almond milk to make it dairy-free. Although a few years back some people thought eggs were in the dairy category, they actually are not. Dairy refers to anything that comes from a cow. I'm also providing an egg-free substitute as well as this can be another allergen many children and even adults can't tolerate.

Want something a little more sophisticated? Try serving them with an apricot Dijon sauce (yes, that's in my cookbook, The Warm Kitchen) or a sriracha or sesame oil mayo. Getting ready for the game? Toss these with your favorite buffalo wing sauce. So many possibilities! Does your child like ranch dressing but can't have dairy? Try Follow Your Heart's vegan ranch dressing.

Give it a try and don't be afraid to fry these. I fill a big pan with about 1/4"-1/2"of oil since I don't fry too often. It's so worth it. Let me know how you like them.

For more gluten-free recipes like this, check out my cookbook, The Warm Kitchen!


Gluten-Free Chicken Tenders 

Makes about 12-16, depending upon the size of the tender

1 pound boneless, skinless chicken breast or tenders

2 tablespoons white rice flour
2 tablespoons potato starch
1/2 tsp sea salt
1/4 tsp each black pepper

1 large egg or egg substitute (see below)
1 tablespoon milk or milk substitute, plain and unsweetened

2 cups gluten-free corn flakes, crushed or ground in a processor (measure first, then crush)

1-2 tablespoons olive or vegetable oil

Egg Substitute: to make 1 egg, mix 1 tablespoon of ground flaxseed with 3 tablespoons warm water in a bowl. Set aside for 5 minutes.


  1. Slice chicken breasts into strips; if using tenders, proceed to the next step. Pat dry if wet.
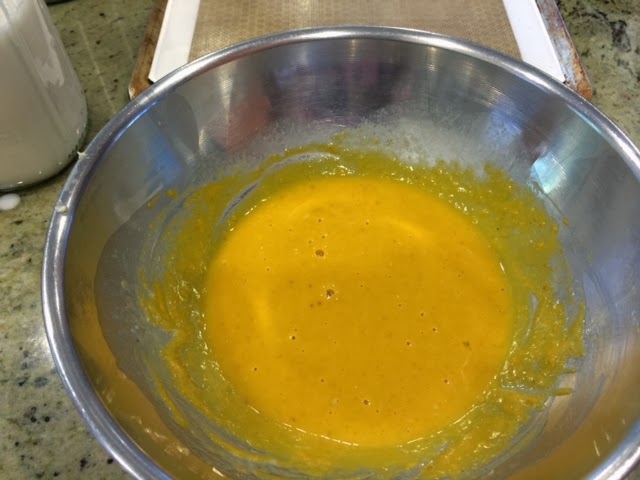
  2. Mix flour, starch, salt, and pepper in a shallow bowl. Place egg or egg substitute and milk in another shallow bowl and beat lightly. Place corn flake crumbs in another shallow bowl.
  3. Bread the chicken. Take 3-4 pieces of chicken and first dip in flour mixture. Shake excess. Dip in egg and then corn flake crumbs. Place breaded chicken on plate or tray until all chicken is coated.
  4. Place 1 tablespoon of oil in a large sauté pan. Heat to medium heat. Add one piece of chicken to the oil. If chicken does not make a sizzle sound, let the pan heat up more. Add chicken pieces but don’t crowd pan. Don’t move chicken; allow to brown. Turn once and cook until heated through. Place on a piece of paper towel on a plate and place chicken on this plate to absorb some of the oil. Use more oil if needed.
  5. To keep tenders warm or to crisp up, place tenders on a baking sheet and place in a 350°F oven for 5-10 minutes.
  6. Serve with So Simple Tomato Sauce, Spicy Orange Sauce, or Barbecue Sauce (see cookbook). 

Monday, February 3, 2014

Freedom Foods Gluten Free Cereal Giveaway

-->


 Thank you to Freedom Foods for providing complimentary samples for my review.


From the “land down under” comes a healthful, tasty product line free from many of the most common allergens, including gluten, dairy and nuts.

Freedom Foods is warmly welcomed into my kitchen not only because of the absence of gluten and dairy, but because the company puts such a high emphasis on creating high quality products that are rich in nutrition and free from artificial colors or flavors.

Which isn’t always an easy task…                             
Freedom Foods


“The tricky part is making food with good stuff minus all the bad stuff,” the company states on their website. “But we reckon we do it pretty well. If we can keep food free from gluten, free from artificial stuff, with less sugar and salt, we know your body is going to feel much better.”

Speaking of feeling better, my son has recently developed a sensitivity to food dyes so, as a mom, I'm so happy there's a natural alternative that's also gluten free (By the way, the TropicO’s fruit flavored cereal rings are our favorite!)

With a dedicated facility, Freedom Foods can assure us that their products are free from the allergens listed and boasts that they are one of the few factories around the world that is free from wheat, barley, triticale, sesame seeds and nuts.

In general, my kids have liked almost everything they have tried from Freedom Foods. When I asked my almost 10-year-old what he liked about the products his response was “It tastes good!”
Freedom Foods Cereals


Tastes good, not too much sugar, good ingredients? What else can we ask for?

I’m offering a Freedom Foods giveaway to three commenters on this blog entry who can tell me about their biggest challenges with allergens and/or how they’ve managed to work around them. I will randomly select the winners and each of the chosen three will receive two boxes of Freedom Foods cereal. Promotion ends on Monday, Feb. 17.  Must be age 18 or over to win; US residents only.
**Due to technical issues, the promotion has been extended.


Wednesday, October 30, 2013

Gluten-Free Pumpkin Scones


-->  


I don't know about you but I often look at things longingly in bakeries. Lately it's been pumpkin almost anything that I can't eat because it's always filled with gluten. Well I finally found a recipe that I was able to translate really well to gluten-free. I made mine dairy-free and it was just as delicious. The recipe includes the variation (it's pretty straight forward).
 

As with any recipe, make it a few times and it won't be hard. The key is to make sure the cold butter or vegetable shortening is incorporated well into the dry ingredients. You can do this either with a food processor (my favorite), a pastry blender (handheld tool) or two knives. This dish is great for breakfast or as a treat with a cup of tea or coffee.

Makes approximately 12-14 medium sized scones
 
6 tablespoons butter or vegetable shortening, cut into chunks

Dry Ingredients:
1 ½ cups Amy’s Gluten-Free Flour Blend
½ cup almond meal (or all gluten-free flour)
Scant ½ cup brown sugar
1 tablespoon baking powder
¾ teaspoon xanthan gum
½ teaspoon sea or kosher salt
Heaping ½ teaspoon ground cinnamon
Heaping ¼ teaspoon ground nutmeg
¼ teaspoon ground ginger
1/8 teaspoon ground cloves
3 tablespoons half and half or 2 ½ tablespoons almond or soy milk + ½ tablespoon vegetable oil
1 large egg
1/2 cup canned pumpkin

Egg Wash:
1 large egg
1 tablespoon milk or milk substitute
Coarse sugar (for example, turbinado)                                    


Sugar Glaze Ingredients:
½ cup powdered sugar
¾ to 1 tablespoon milk or milk substitute

1. Preheat oven to 400˚F.  Prepare a baking sheet with a silicone baking mat or parchment paper.
2. Place butter or shortening in the freezer for about 5 minutes. Measure the dry ingredients while it chills.
3. Combine the dry ingredients in the bowl of a food processor. Pulse about 5-10 times until dry ingredients are mixed well.
4. In a medium to large bowl, beat the eggs first, then add the milk and pumpkin. Set aside.
5. To the bowl of the food processor, add the chilled butter or shortening. Pulse 20-30 seconds or until mixture looks like grated parmesan cheese. You can also use a pastry blender to blend the butter or shortening with the dry ingredients.
6. Gently mix the dry ingredients into the wet ingredients with a spatula. Form into a ball.
7. Place some gluten-free flour on a clean counter. Place the dough on the counter and pat into a rectangle about 1” thick.
8. Use a knife or pizza cutter to cut into triangles. Transfer to the baking sheet.
9. To make the egg wash, mix egg and milk or milk substitute in a small bowl. Brush each scone with the wash. Sprinkle each scone with coarse sugar.
10. Place in oven and bake about 12-15 minutes or until scones are golden brown. Scones should be crisp on the outside and soft on the inside.
11. After about 3 minutes, transfer to a wire rack.
12. Once cool, prepare the sugar glaze. In a small bowl, whisk together the powdered sugar and milk until smooth.  If it’s too runny, add more sugar.  If too thick, add a little more milk until reaching desired consistency.  Drizzle the glaze over the top of each cooled scone and enjoy. 


Tuesday, March 26, 2013

Strawbunny Smoothie recipe

Thanks to Kendra Thornton for the guest post and providing the following recipe. This sounds fun! 


The Strawbunny Easter Smoothie Treat
On one of my former travels, my husband and I went on a fabulous vacation to Las Vegas. It's a beautiful city full of excitement and commotion. It's no wonder that the city draws millions of people every year. It was a nice change from the usually cold and windy weather of Chicago. Although I love where I live, Las Vegas was a welcoming change of pace.

However, one of the most memorable parts of the trip was the smoothie I had at the Cosmopolitan, ranked amongst some of the top hotels in Las Vegas. It was one of the best smoothies I had ever had. Not only was it refreshing but also it was extremely flavorful. I love how it has just the right amount of sweetness without it being overpowering. Strawberries are one of my most favorite fruits so I love how this smoothie uses it into its recipe. But the best part of this smoothie is the presentation.

To help celebrate this year's Easter with you all, I want to share this recipe and maybe it will become a favorite in your family as well. The following recipe's proportions make about 2 cups of the smoothie. The recipe is incredibly simple and easy without any complicated steps. The ingredients include the following...

Strawbunny Easter Smoothie:

Ingredients:

- 1(1/2) cups of frozen strawberries
- 4 tsp. of low-fat vanilla yogurt (for dairy-free, add extra milk alternative and 1 teaspoon of sugar)
- 2 tsp. of peanut butter
- 1/2 cup of skim milk (for dairy-free, use a milk alternative)
- Marshmallow (Bunny) Peeps

Directions:
The only step of this recipe is to put all the ingredients into the blender and mix. One tip is to only put a few strawberries into the blender at a time, as it will make blending easier. If your strawberries are exceptionally large, make sure to cut them into smaller pieces so that the mixture blends more smoothly. Keep the blender going as you continue to add in a few strawberries at a time.

Presentation is key with any special holiday meal, drink, or dessert. I like to make it more festive by serving a glass of this on top of a plate of Easter grass. I usually put some chocolate eggs sitting on the bottom sitting on top of the grass. It's the perfect centerpiece to be placed in the middle of the kitchen table on Easter morning. This breakfast decoration never ceases to bring smiles to my children's faces every Easter morning after they wake up.

I hope you enjoy this treat just as much as my family does this holiday…enjoy!
-Kendra

Kendra Thornton is a travel advocate, TV spokesperson, PR businesswoman, proud wife and mama of 3. I am a long time travel expert who has been packing my bags and traveling the world since I was 3 months old! I've found my utmost desire in life is right here in my own home. I have mixed my excitement for travel by bringing the taste of authentic cuisine to my own home with some of my unique recipes. Enjoy!

Tuesday, March 5, 2013

Gluten-free Dairy-free Blueberry Muffin recipe


Whether you make your own gluten-free flour mix or buy one like Auntie’s Flour Blend, it’s easy to make really tasty muffins. You just need a fool-proof recipe!

I’ve been making these muffins for about 5 years. When my daughter was first diagnosed with a gluten and dairy sensitivity, I put my best foot forward and figured out the perfect combination of ingredients to create a moist and flavorful end product. There are a few rules, though, that are important to follow. Here are my suggestions:

Gluten-free Muffin Tips

  • Tip #1: Mix the dry ingredients in a large bowl first. Mix the wet ingredients in a small bowl. Add wet to dry. This is generally always the process with baking.
  • Tip #2: If you use a pre-made flour blend, make sure to look at the ingredients. For example, if the flour mix already has xanthan gum, you don’t need to add that to the recipe.
  • Tip #3: You can vary the sugar based on how sweet you want the muffin to be. I usually use just over ½ cup which seems to be perfect. Over ¾ cup is too sweet for me.
  • Tip #4: For easy and consistent portioning when making muffins, use a hinged-type ice cream scoop (also known as a scooper). These can be found at restaurant supply stores in different sizes.
  • Tip #5: Always test muffins 1-2 minutes before the recommended time in case your oven is hotter than normal. Instead of using a toothpick to test for doneness, press your finger into the muffin. When it springs back, it’s done. If it leaves an indentation, continue to bake and test in 1-2 minute intervals.


Gluten-Free Dairy Free Blueberry Muffins 
2 cups Amy’s Gluten-Free Flour Blend
2 teaspoons baking powder
1/2 teaspoon baking soda
1/2 teaspoon sea or kosher salt
1/2 teaspoon xanthan gum (omit if using a mix which includes this)

2/3 cup milk substitute
2 teaspoons white vinegar or lemon juice
2 large eggs
1/3 cup melted coconut oil or vegetable oil
1/2 - 3/4 cup organic sugar or other natural sweetener
1 cup fresh or frozen blueberries (keep frozen until ready to use)

Optional: 2 tablespoons gluten-free instant oats

Tip: if using fresh blueberries, make sure they are dry; otherwise they might sink to the bottom.

1. Preheat oven to 375F and prepare pans by greasing well or lining with paper cups.
2. In a large bowl, mix the dry ingredients (first 5 ingredients).
3. Place the milk substitute and vinegar and lemon juice in a glass measuring cup. Set aside for a few minutes.
4. In a smaller bowl, beat the eggs briefly. Add the oil, sugar, and milk substitute.
5. Add the wet ingredients to the dry ingredients and mix until combined. Mix the batter briskly for 5 seconds to help the gum to gel.
6. Fold in blueberries. Portion out muffins or loaf, filling about 2/3 full. Optionally sprinkle muffins with oats (see photo).
7. Bake mini muffins for 12-15 minutes or regular muffins for 18-22. Remove from oven and cool slightly. Remove from pan and cool. Leftovers can be stored at room temperature for 1 day. After 1 day, store in the refrigerator. Muffins can be frozen in an air-tight container for about 3 months.

Monday, October 8, 2012

Pumpkin Pie Muffins (gluten-free and regular)


There's not much to say about these delicious muffins! This recipe will be in my cookbook. One of the testers said "My daughter said they tasted like pumpkin pie. And my little guy couldn’t help himself from stealing fistfuls of the ones we were trying to save for his daddy."

You can easily call them a cupcake if you add buttercream or cream cheese frosting (as seen above). Since many of my recipes started out "regular" and then I converted them to gluten-free, I thought it would be easiest to provide options for either.

Here are a few more tips:

  • Gather your ingredients on the counter first. Eggs are best if used at room temperature.
  • Use one bowl for dry ingredients and one bowl for wet. Measure the dry ingredients first.
  • Invest in a good 12-cup muffin tin that won't burn the bottom of your muffins. It will be worth it.
  • For easy and consistent portioning, when making muffins, use a hinged-type ice cream scoop (also known as a scooper). These can be found at restaurant supply stores in different sizes.
Enjoy!


Pumpkin Pie Muffins (regular and gluten-free)

Dry Ingredients
2 cups Amy’s Gluten-Free Flour Blend or regular all-purpose flour
2 tsp baking powder
1/2 tsp baking soda
1/2 tsp salt
1/2 tsp xanthan gum (omit if not making gluten-free)
1 rounded tsp ground cinnamon
1/2 tsp ground ginger
1/2 tsp ground nutmeg
1/4 tsp ground cloves

Wet Ingredients
2 large eggs
1 can (15 to 16 ounces) pumpkin puree
1/3 cup melted butter or vegetable oil
1/2 cup milk or milk substitute
1/2 -3/4 cup organic sugar or other natural sweetener
1 tsp vanilla
Optional: 1/2 to 3/4 cup chopped pecans and/or raisins

1. Preheat oven to 350º F. Line muffin pans with paper cups or grease tins generously.
2. In a large bowl, mix the dry ingredients.
3. In another medium bowl, mix the eggs. Add the pumpkin, butter or oil, milk, sugar, and vanilla.
4. Add the wet ingredients to the dry ingredients and mix gently. Add nuts if using.
5. Portion out regular or mini muffins into the cups, filling 2/3 full. Bake regular muffins for 20-25 minutes or mini muffins for 12-16 minutes.

Tip: Always test muffins 1-2 minutes before the recommended time in case your oven is hotter than normal. For regular muffins, insert a toothpick into the center of a muffin. When it comes out dry with some crumbs, it is done.
For gluten-free muffins, instead of using a toothpick to test for doneness, press your finger into the muffin. When it springs back, it’s done. If it leaves an indentation, continue to bake and test in 1-2 minute intervals.

6. Once done, allow muffins to cool for about 2-3 minutes and then remove from the pan.

Wednesday, February 1, 2012

Stretch Island offers next best alternative to fresh fruit!


 Thank you to Stretch Island Fruit Company for the complimentary sample to review this product.

I try to give my family fresh fruit but it’s not always easy, especially when we are on the go. Sometimes I need a back-up plan. Stretch Island offers an alternative to fresh fruit with their dried fruit puree snacks. One of their newer products, the FruitaBu's Smooshed, has been a big hit.

My kids have tried all three flavors (apple, strawberry and grape) and compete for them if there's only one for a lunch box! The sugar level in this fruit snack comes in a little high, but it’s naturally occurring, comes with a good amount of potassium and counts as a full serving of fruit. Just make sure to round out your children’s snack with a form of whole grain such as a whole grain cracker or protein, like nuts.
In addition to the product itself, I also like the fact that the Stretch Island company gives back to the community. Through teaming up with the Fruit Tree Planting Foundation, the company created Fruit Tree 101. The resulting program plants lessons in sustainability and eating right in the form of orchards it donates to schools across the country. Students and teachers at these schools work together to plant the trees and discuss the fruit’s importance for human health and the environment. How idyllic!

Back in November, students at one San Francisco elementary school and one high school planted apples, pears, berries and citrus fruit trees and shrubs -- more than 60 all together and some standing up to seven feet tall. (Check out photo above)

My kids appreciate the fun factor in their fruit and I take comfort in knowing the company prides itself on good health and social responsibility.

Plus, I agree that the product is tasty!


Wednesday, December 21, 2011

Grandma Hoerner's Applesauce review and Duck Sauce recipe

Last year, I met the nice folks at Grandma Hoerner's at The Fancy Food show. I loved their products like the preserves and the dark fudge sauce. I must have made a comment about how much it was like the low sugar preserves I buy from Trader Joes. Guess what? That's their product!

Last year, I posted a recipe for Apricot Dijon Chicken which I use for both my family and in cooking classes. I love that their products are natural and mostly organic. For the preserves, they reduce the sugar rather than use a substitute sugar. As a mom, I love that the preserves are not as sugary.

We recently tried the Big Slice Applesauce and served it with gluten-free latkes. This applesauce has no added sugar; it's sweetened from fruit juice instead. This makes it just sweet enough. Both of my kids loved it. I wanted to share some other ideas for how you could use it:

  • Serve with a pork or turkey roast as a side dish.
  • Serve with potato pancakes, aka, latkes.
  • Add to yogurt with a little cinnamon for a snack.
  • Make a "duck sauce" (see recipe below) to serve with eggrolls or wontons.
  • Eat it out of the jar with a spoon (ok, maybe just when it's almost finished).
  • Serve warm over vanilla ice cream (skip the pie crust).
I hope you will give it a try. I don't think they sell this at Trader Joes; maybe they should. You can also order it on-line. Enjoy the recipe!

Amy's Duck Sauce

1 cup of unsweetened or low sugar applesauce
¼ teaspoon each ground garlic and ginger
2 teaspoons low sodium soy sauce
½ teaspoons sesame oil
1 teaspoon rice wine vinegar
2 Tablespoons sugar (use only 1 Tablespoon if applesauce is sweetened)
2-3 Tablespoons apricot or peach preserves (another great Grandma Hoerner's product!)

Place all ingredients in a food processor or blender and pulse for 20-30 seconds or until pureed. Place in the fridge for 30 minutes if possible. Serve with eggrolls, wontons, or grilled chicken or shrimp.

Friday, August 26, 2011

Gluten Free Maui Banana Bread recipe

When you go to Hawaii, more specifically Maui, it seems like there's a checklist of what most people do or see like snorkeling, going to Haleakala, seeing a rainbow (maybe even a double!), attending a luau, and driving the road to Hana which includes consuming the famous banana bread from any one of a number of roadside stands.

On our way to Hana, we never made it to one of the roadside banana bread stands, mostly because they all had gluten in them. I did allow myself to taste one local batch from a grocery store in Ka'anapali because I was curious. The family also agreed it was delicious.

When I returned home, I was determined to recreate the same flavor but in a gluten-free variety. After doing some cross referencing, I decided to use my own recipe for banana bread with the addition of salted macadamia nuts and some extra cinnamon. The result was simply delicious; the bread is moist and sweet with a hint of cinnamon and a nice crunch from the macadamias. Why not give it a try? You will be saying "Mahalo" or thank you for sure!

Gluten-Free Maui Banana Bread

2 cup basic Gluten-Free flour blend (you can use your own to try this one)
2 teaspoon baking powder
1/2 teaspoon baking soda
1/2 teaspoon salt (use less if the nuts are salted)
1/2 teaspoon xanthan gum
1/8 teaspoon ground ginger
1/2 teaspoon cinnamon

2 large eggs
1/2 cup melted butter or vegetable oil    
1/3 cup milk or yogurt 
3/4 cup brown sugar
1 teaspoon vanilla
3 ripe, mashed bananas
1/2 c chopped macadamia nuts or walnuts
Optional: 1/2 c unsweetened shredded coconut

1. Pre-heat oven to 325F and generously grease loaf pan.
2. In a large bowl, mix the dry ingredients (first 7 ingredients).
3. In a smaller bowl, mix the eggs, then add the butter or oil, milk or yogurt, sugar, vanilla and banana.
4. Add the wet ingredients to the dry ingredients and mix. Stir in the nuts and optionally, the coconut.
5. Place batter into loaf pan.
6. Bake for 40 minutes or until the top is golden brown and the middle is set.

Wednesday, June 22, 2011

Gluten-free crepe recipe

Sometimes I can be intimidated to cook certain foods, especially new gluten-free dishes. For some reason, I thought crepes would be similar to going into the chem lab. I'm happy to report it can be made just as easily as regular ones! But, my theory behind knowing how to cook, regardless of whether it's gluten-free or not, holds true. Technique is very important.

The recipe I used was from Gluten-Free Gobsmacked. I really like her simplicity and explanation of each step. See below for my version and additional instructions. Either way, great product.

I can't wait for my little girl to try them. She made some in camp this week but could only eat a bite as it was made with regular flour. While at camp, she also had a hamburger bun because she thought it was gluten-free; a bit of miscommunication. Poor thing was so itchy last night, it made me sad. Her gluten sensitivity comes out in her skin. I suppose it is this that motivates me to try things.

It's hard as a parent to deny your children something as simple as a crepe. If you have had to stop making crepes in the past, look no further! Enjoy.

Gluten-Free "Very Easy" Crepes

Makes 6 crepes in a 10" crepe pan (I would suggest doubling this recipe so you can make more at once)

2/3 cup milk (I would suggest whole)
1/3 cup (or 50g) cornstarch*
1 large egg
2 teaspoons olive oil or melted butter
pinch of salt
* to make a buckwheat style crepe, I use 1/2 cornstarch and 1/2 buckwheat flour

Directions:
  1. Place all ingredients in a blender and mix until combined.
  2. Add a drizzle of oil to the pan. Heat crepe pan to just over medium heat. This is a little tricky so don't be surprised if the first crepe isn't perfect.
  3. Lift the pan off of the heat and pour 2 tablespoons of batter into the pan while swirling the pan. I used a special crepe ladle which worked well. Swirl the pan off of the heat until the batter begins is covering the bottom. 
  4. Cook for 20-40 seconds or until the edges are browned and start to pull away from the side. If the crepe is not brown, you may need to raise the heat. A gas stove works very well for this.
  5. Using a spatula, lift one edge of the crepe and then flip it over with your fingers or tongs. Cook an additional 15-20 seconds.
  6. Repeat with remaining batter.
  7. Enjoy as a breakfast dish with eggs, savory dish with salad or snack/dessert with nutella, fruit or chocolate.

Monday, June 21, 2010

Rainbow of Veggies

From the top, red pepper, carrots, zucchini sticks, cucumbers,
cheddar cauliflower, cooked broccoli, raw broccoli and grapes (I needed something purple!)


On the last day of school this year, I didn't walk into the classroom with cookies or cupcakes. Sorry, call me boring or no fun but that's my style. Part of what I love about what I do is that I can test theories on children without them even knowing it.

I am pretty sure if I walked in the door with a platter full of vanilla frosted cupcakes, these 20 children would have wooped and woohooed. Although I think they would have been surprised. All year, I have been talking to them about eating healthy and what that means. I also told them it's ok to have cookies, candy or a treat; after they ate something that was good for them. I don't believe in abstinence when it comes to sweets; my rule is as long as my kids have had some type of growing food first (thanks Dayna for the great term!), it's fine. My hope is that some of the children I worked with this year actually listened to me.

When I walked in the classroom with my container of cut up vegetables, I wasn't even sure how it would go over. The children stood around the table while I explained to them we were going to make a rainbow of veggies. When I talk to children about nutrition, I often suggest they eat a "rainbow" of fruits and vegetables. This helps explain why we need a little of everything; many of the different colors equate to vitamins.

I used a blue platter for the blue and purple grapes. Making beets or cooking blue potatoes wasn't in the cards that morning. They all helped decide in which order the vegetables were placed. Their enthusiasm was contagious!

I then went around and asked each child which veggies they would like along with some ranch dip. Some wanted all; some only wanted a few. There were 4 tables of 5 and by the time I was serving the second table, the first one was done and asking for more. I asked them to wait patiently until I finished serving everyone.

So here was a room of 5 and 6 year olds inhaling (and I'm not exaggerating) fresh, mostly organic, vegetables. My son even tried the red pepper (but still doesn't like them). As parents, we sometimes think that giving children treats and cupcakes is fun for them. Be assured, these children did not even ask where dessert was that day. In fact, they hounded me for more! This was even after their snack.

I hope this post is inspiring to you. I may not be able to change the world but if I can help just a few people, I'll be happy. Leave a comment if you like this. Thanks!

Monday, October 26, 2009

Toasted Pumpkin Seeds recipe

Ok, this is the week to carve your pumpkins. Instead of throwing away the inside, consider two options: compost or toasting the seeds. Did you know pumpkin seeds are very nutritious?

I'm looking forward to burying my pumpkin remains in hopes of creating a pumpkin for next year. We did this a few years ago and it actually worked!

But this past weekend, I cleaned up the seeds, tossed with olive oil and kosher salt and created a delicious little snack. Here are some good tips:
  • Work quickly; if you don't clean the seeds right away, the pulp will dry and be difficult to remove. If necessary, place in a ziploc bag to keep moist.
  • Wash the seeds in a strainer to try to get as much as the pulp off as possible.
  • Use a kitchen towel to dry the seeds and make them less wet.
  • Toss with olive oil and salt. You can also use sugar and salt for a "kettle corn" flavor, chili powder with cumin, or garlic salt.
  • Use a large enough baking sheet and make sure there is a single layer. Otherwise, use 2 sheets.
  • Bake in a low oven, no higher than 325ºF or you risk the seeds burning.
  • If the seeds have gotten soft during storage, pop into the toaster oven for a few minutes.
  • Although it's nutritious, this might be hard for children under 3 or 4 years old to eat.
As always, I hope you enjoy this recipe!

Toasted Pumpkin Seeds (about 2 cups raw)

1. Wash pumpkin seeds, trying to remove as much of the pulp as possible.
2. Dry seeds with a kitchen towel or paper towels.
3. Toss with about 2 tsp olive oil and 1/2 tsp kosher salt.
Variations: 1 tsp garlic salt; salt and 1 tsp organic sugar; 1/2 tsp each chili powder and cumin
4. Pre-heat oven to 300ºF.
5. Place seeds on a baking sheet (I like the Chicago brand) and place in oven. Stir every 10 minutes and cook about 25-28 minutes or until golden and toasted, being careful not to burn.
6. Once cool, place in an airtight container and leave at room temperature.

Friday, October 2, 2009

Whole Grain Pancake Mix recipe

One year, I made a layered whole grain pancake mix to give as a Holiday gift. It was a big hit in our house and with others so I started making it on a regular basis. I adapted the recipe, originally from Parents magazine, to create the one below. I also doubled it since it seems to be easier to do all of the measuring at once.

When I made the pancakes, I also doubled the recipe of the pancake batter. We had plenty for breakfast and I froze the rest.

For those of you who buy a whole grain pancake mix from the store, don't be intimidated; it's very easy to do it yourself. It's usually less expensive and you have more control over the ingredients. This one is packed full of nutrition.

I served it to some of the neighborhood kids as a snack; they ate it just plain, without the syrup. Why not boost your nutrition in the morning by trying this recipe? It's worth every bite!


These pancakes make a great snack

Whole Grain Pancake Mix
It’s easiest to make this in a big batch and place in an airtight container. You can make a smaller batch by making 1/2 of it. Mix the following dry ingredients together in a large bowl using a whisk to incorporate the baking powder and baking soda into the flour. Place into an air-tight container.

1 cups all-purpose flour
3 cups whole-wheat flour
1 cup quick oats
1 cup cornmeal
1/2 cup ground flaxseed meal
1/2 cup wheat or oat bran
1/4 cup sucanat (sugar cane natural or brown sugar)
2 Tbl baking powder
1 Tbl + 1 tsp baking soda
2 tsp salt
1/2 tsp nutmeg (optional)
2 tsp cinnamon (optional)

Whole Grain Pancakes
For one batch of pancakes, whisk together until combined:
1 cup of buttermilk (to make your own, place 1 Tbl of vinegar in a glass measuring cup; fill with milk to measure 1 cup and wait 5 minutes)
1 egg
1 Tbl vegetable oil
1 tsp vanilla (optional)

1. Stir in 1 1/4 cup of dry pancake mix just until combined. Heat non-stick skillet over medium heat.
2. Pour 1/4 cup batter per pancake into pan and cook 1 1/2 to 2 minutes per side or until pancake is golden.

Makes eight 4” pancakes per batch

Wednesday, September 30, 2009

Zucchini Muffin recipe

Well, you may remember that we started a garden this year. For me, this is a big deal as I've always described myself as having a brown thumb. The zucchini are really doing well.

I was looking at one the other day and then noticed a really big one growing; it was almost hidden. It reminded me of the time my dad brought in a zucchini to my mom that he picked in our garden (my mom was a great gardener; not me). He was so proud until my mom looked at it and said "Sandy, that's a pumpkin!". Oh well; at least he tried.

The one thing with zucchini is that you don't want them too big. If you are using them in a salad or sauteing them, go for the smaller ones which usually have more flavor. For muffins or bread, a larger one is fine.

I had found a recipe online a few years ago and started playing with it, changing the butter to oil, white sugar to less refined and adding coconut and walnuts for flavor and added nutrition. Remember, unless your child is overweight, kids need fat, especially healthy fats (for example from plants and nuts as opposed to fat from dairy and meats).

If you still have zucchini in your garden and find it at the farmer's market, try this recipe for yourself or your family.

Here are some recommendations for equipment and products I like to use:
Cuisinart food processor
Stainless steel measuring cups
Stainless steel mixing bowls
Silicone scrapers

Zucchini Muffins
Makes 12 or about 32 mini

2 1/8 cups whole wheat pastry flour (this is slightly lighter than wheat flour)
1/2 teaspoon baking soda
1/2 teaspoon baking powder
3/4 teaspoon salt
2 teaspoons ground cinnamon

2 large eggs
1/2 cup vegetable oil
1/4 cup molasses
3/4 cup sucanat (Sugar Cane Natural; look for it in stores or use an unrefined cane sugar)
1/4 cup organic white sugar
1 teaspoon vanilla extract
1/2 cup unsweetened shredded coconut

1/2 cup chopped walnuts (optional)
2 cups finely shredded unpeeled zucchini-about 2-3 small or 1 medium
2-4 Tbl water

Preparation:
1. Grease and flour 12 muffin cups. Heat oven to 375°.
2. Combine the flour, soda, baking powder, salt and cinnamon in a medium to large bowl.
3. In another mixing bowl, beat the eggs first then add oil, molasses, sugars, vanilla extract and coconut.
4. Add the wet ingredients to the dry ingredients, stirring briefly until blended. Fold in the shredded zucchini and nuts. If the mixture is too stiff, add water until it has more of a batter consistency.
5. Fill muffin cups about 3/4 full. Bake for 20-22 minutes. Make sure you test with a toothpick at the lower end of the time. If there is still batter on the toothpick, cook in 1-2 minute intervals until done.

Monday, July 6, 2009

Healthy Lemonade Recipe

My kids and I made this one day when they asked for lemonade. Making a simple syrup can be time consuming so I opted for the agave nectar. This lemonade is not too sweet and the fresh lemon gives it a nice tart flavor.

We also served this at pre-school. The 3 to 5 yr olds gave it a double thumbs up! Hard to beat considering it has no refined sugar. Agave nectar also has a low glycemic index which means your blood sugar does not shoot up. You can even make individual lemonade right in your glass.

Remember, keeping key ingredients on hand is a great strategy for easy prep and cooking. Happy summer!

Healthy Lemonade

Crushed ice
Water
4 lemons
2-3 Tbl agave nectar

1. In a 2 qt container, place enough crushed ice to fill about 1/4 of the container.
2. Squeeze fresh lemons and place juice in container. Add the agave nectar and then enough water to fill container.
3. Mix and taste. Add more agave if it's not quite sweet enough.

Friday, May 8, 2009

Wheat-Free Banana Muffins or Bread

Like most people, I don't like to throw out food. Most food, as it gets "older" just gets closer and closer to the garbage (or disposal or compost bin). But one food, bananas, can change from a mushy, smelly fruit to a delicious muffin or bread.

For whatever reason, last week, I bought too many bananas. Today I had 5, gold in color with brown spots. I figured I could use 3 for muffins. I have also been trying to go gluten free for the last 2 weeks and doing very well. However, the last 2 days I have re-introduced barley and have had some oats. My system seems to think this is ok, so I decided to try the muffins made with these flours instead of traditional white (which is derived from wheat) flour. I have been hearing more and more that our bodies, especially when we (ahem) get older, can have a hard time digesting wheat. It also means I have to be more creative with other grains, fruits and veggies.

The other part of the story is the topping. I meant to put some chopped walnuts in the batter and realized right after I had portioned the muffins, I had left it out. I put about 1 tsp of nuts on each muffin along with maybe 1/2 tsp of brown sugar. I gave it a little stir and hoped for the best. That was a good mistake!

Anyway, I hope you'll give these a try. Of course, you can use wheat flour (white or whole wheat) if you don't have barley or oat.

**Please note: these are NOT gluten-free; only wheat-free. I made them while I was experimenting with a wheat-free diet. I have learned I cannot tolerate barley.

Wheat-Free Banana Muffins or Bread

1 cup Barley flour
1 cup Oat flour
2 teaspoons baking powder
1/2 teaspoon baking soda
1/2 teaspoon salt
Sprinkle of cinnamon (to taste)

2 large eggs
1/3 cup melted butter or veg oil
2/3 cup milk or yogurt (I had used sweetened yogurt, therefore only used 1/2 cup sugar)
1/2 – 3/4 cup sweetener like sugar, brown sugar, succanat, etc
1 tsp vanilla
2-3 ripe, mashed bananas

Optional: add ½ cup chopped nuts like walnuts or pecans to the wet ingredients.

1. Pre-heat oven (see Temperature Guidelines below) and get pans ready.
2. In a large bowl, mix the dry ingredients (first 6 ingredients).
3. In a smaller bowl, mix the eggs, then add the butter or oil, milk or yogurt, sugar, vanilla and banana.
4. Add the wet ingredients to the dry ingredients and mix gently.
5. Portion out muffins or loaf.

Tip: If using a muffin tin, try using an ice cream scoop. If you don’t have one, go to a restaurant supply store that sells many different sizes; these are the best ones.

Temperature Guidelines:
1 loaf pan: Bake at 350° F for 45-55 minutes.
Regular muffin pan: Bake at 375° F for 20-25 minutes, yield 12-16 muffins
Mini muffin pan: Bake at 375° for 15-18 minutes, yield 40 mini muffins

Thursday, April 23, 2009

Homemade Granola-Regular or Gluten Free

Granola with Strawberries and Vanilla Yogurt


Granola can be very expensive. Have you ever wondered how to make it? It's quite easy. You need the right ingredients, a big bowl and a rimmed sheet pan. That's it. Oh, I suppose a good recipe helps, too.

Granola is a great snack. It can be used with yogurt and fruit or even on top of vanilla ice cream. When you make your own, you save money and can control how much sugar and fat goes in. Granola can be packed with fiber, vitamins and nutrients. And you can use whichever ingredients you like. Oats are the main ingredient in granola. You add sweet for flavor and fat for crispiness. Nuts are a nice accompaniment along with the cinnamon and sunflower seeds.

It's not easy to find gluten free granola. When you do, it can also be very expensive and some times it might have other ingredients you might not be able to have (this was the case when my daughter had food sensitivities). Making your own with the ingredients you like and/or can tolerate seems like a good idea.

I recently decided to go gluten free for a while to see if I experience any changes. Plus, it almost guarantees that I will eat less carbs. This version that you see is gluten free but you really can't tell. The key is buying gluten free oats. Oats do not have gluten inherently but it's picked up from other grains processed on the same machines. Some companies now harvest oats on separate machines which keeps the gluten out. That's great news for folks with celiac disease or anyone with gluten sensitivities.

I keep most of these ingredients on hand so when I decided this morning I wanted my own granola, it was done in about an hour. Ok, not counting the time I took to take the pictures and the time my daughter decided to help me. I like this recipe so much, it's going in the cookbook! Another bonus is that this granola has no refined sugar and lots of healthy ingredients like flax seeds and pecans. I hope you'll like it, too.

Homemade Granola (Regular or Gluten Free)

(makes 8 cups - about 1/2 gallon ziplock)

4 cups old-fashioned rolled oats*
1 cup toasted wheat germ* (you can toast in a sauté pan the same way you do with nuts)
1/2 cup flax seeds
1 1/2 tsp ground cinnamon
1 1/2 tsp ground ginger
1 cup unsalted sunflower seeds
1 cup chopped walnuts or pecans
1/2 cup shredded unsweetened coconut
3 Tbl molasses
2 Tbl agave nectar
1/3 cup canola or safflower oil
1/3 cup water

1/2 cup raisins
1/2 cup dried cranberries

1. Heat oven to 300 degrees with rack in center. In a large mixing bowl, combine the oats, wheat germ, flax seeds, cinnamon, ginger, sunflower seeds, walnuts, and coconut.
2. Pour the molasses, agave nectar, oil, and water over the mixture and stir until it is well coated. Spread evenly in one or two rimmed baking sheets.
3. Bake, stirring every 15 minutes, until dry and lightly browned - about 40 minutes. Let granola cool to room temp, then add raisins and cranberries.
4. Store in an airtight container at room temp for up to 1 month.

*To make it Gluten Free, use GF oats and omit the wheat germ.

Monday, November 17, 2008

Gluten Free Pumpkin Bread on a Budget

I have come to learn that gluten free (GF) products can be expensive. There is certainly a market for it. The other day, I bought some GF cupcakes and was amazed at how expensive it was (and unfortunately how dry it was, too). Later than week, I bought a vanilla cake mix and although it was less expensive than the cupcakes, it was still pricey.

In today's world, one way to help save you money is to make it yourself, whether you eat gluten free or not. I've made this recipe a number of times, both regular and gf. I've also made it as a loaf and muffins.

Remember, the key to making it easy is to have all of your ingredients on hand. Pull everything from the cabinets/fridge and put on the counter. Pre-heat the oven. Start with the dry ingredients in one bowl; mix the wet in the other. Portion into the pan or muffin tins. Check for doneness before the end of the baking cycle. For less than $3-4 dollars, depending upon where you buy your ingredients, you'll have a great snack that can even pass for dessert. I hope you'll like it.

Gluten-Free Pumpkin Bread

Ingredients:

  • 2 cups Gluten-Free Flour Blend
  • 1/2 tsp xanthan gum
  • 2 teaspoons baking powder
  • 1/2 teaspoon baking soda
  • 1 scant teaspoon ground cinnamon
  • 1/2 teaspoon ground ginger
  • 1/2 teaspoon ground nutmeg
  • 1/4 teaspoon ground cloves
  • 1/2 teaspoon salt

  • 1 can (15 to 16 ounces) pumpkin puree
  • 1/3 cup melted butter or veg oil
  • 1/2 cup milk or milk sbustitute
  • 1/3 cup brown sugar, packed
  • 1/4 cup granulated sugar
  • 2 large eggs, beaten
  • 1 teaspoon vanilla
  • 1/2 to 3/4 cup chopped pecans or raisins
  • cinnamon-sugar, optional

*For regular pumpkin bread, use 2 cups of all-purpose flour and delete the xanthan gum.

Preparation:

1. Pre-heat oven to 350°. In a large bowl combine flour, xanthan gum, baking powder, baking soda, cinnamon, ginger, nutmeg, cloves and salt. Stir to blend.
2. In separate bowl, combine pumpkin, melted butter or oil, milk or half-and-half, the beaten eggs, sugars, and vanilla; mix until blended. Stir pumpkin mixture into the dry ingredients until moistened. Fold in pecans or raisins. Do not overmix.
3. Spray loaf pan with non-stick spray or oil. Pour batter into pan and sprinkle with cinnamon-sugar if desired, and bake for 25-30 minutes or until a toothpick comes out clean.
4. For muffins: Use a muffin tin. Bake at 375° for 14-18 minutes. Makes 12-16 muffins.

Monday, October 6, 2008

Gluten Free Waffles (and regular too)

I love making waffles for the family; even on the weekdays. I always make extra and put them in the freezer. My almost 3 year old daughter would eat them every day if I let her. She's the one with the gluten sensitivity so I've adapted a favorite recipe just for her. The thing is, these are so good, you'd be hard pressed to be able to tell that these aren't made with white flour.

Making homemade waffles serves other purposes besides a happy tummy. It is much more economical and usually less processed, depending upon the brand you buy. The gluten free variety can cost between $3.25-$3.99 for 6. When you think of the price of flour, milk and eggs, you're spending much less money when you make it yourself.

If you don't have time during the week, take one day on the weekend and make a double batch. I've read (but have not tested) that, when doubling a recipe, you shouldn't increase the baking powder or soda. Supposedly, the chemical reaction does something strange to the batter. You could always make one batch, keeping the ingredients handy, and make the second one right afterward. Or, start with doubling a batch before you make more than that to see if it works.

When making waffles, there are 2 important aspects. Make sure you have some type of acid like buttermilk or yogurt and allow the batter to sit for 5 minutes before making waffles. Once you get the batter down, you can really have fun. Whole grain, banana, pumpkin, chocolate chip, blueberry...make what ever you or your family likes. And although this recipe is gluten free, you could easily substitute any other flour.

Lastly, let's talk equipment. I've had my Cuisinart waffle maker for a number of years now. New, this unit that you see in the picture above, is around $30.00. I have also found that now that it is in a more accessible place (before the remodel, it was tucked away in a hard-to-get-to drawer), I make them at least once every two weeks. Give it a try. I think you'll like the results.

Gluten Free Waffles
makes 7 or 8 6" round waffles

2 1/4 cups of gluten free flour (I use a combination of brown rice, millet, tapioca and garbanzo)
1 Tbl baking powder
1 tsp salt
1 tsp cinnamon
1 1/4 cups buttermilk (see note below to learn how to make your own buttermilk)
3 tablespoons Sucanat (or other natural sweetener)
2 Tbl vegetable oil
2 eggs
1 tsp vanilla

Note: to make 1 cup of buttermilk, place 1 Tbl white vinegar in a glass measuring cup. Add milk, soy milk or rice milk to measure 1 cup. Allow to sit for 5 minutes. If you do this first, you won't have to wait.
1. In a bowl, mix flour, baking powder, salt and cinnamon.
2. In another bowl, combine milk, oil, sucanat, eggs and vanilla. Slowly add dry ingredients to liquid ingredients, whisking together.
3. Allow to rest for 5 minutes before using. Batter will be thin; this makes it easier to pour. I usually use 1/2 cup of batter per waffle. Follow waffle maker instructions.
4. Cool before freezing.
Note: If you want crispier waffles, add more oil and/or cook longer.

Tuesday, June 10, 2008

Strawberry Fields Forever

It's Strawberry Time!

How could you not want to grab one of these and just take a bite? If you happen to live in an area where strawberries are bountiful from May until September, like in Northern California, this is the norm.

On this particular day, I was at the Half Moon Bay Farmer's Market. When I brought these organic strawberries home, my kids were fighting each other for them. The berries were just so naturally sweet. Luckily, I was able to get a few myself.

So, what to do with these gems besides washing and eating? Well, strawberry shortcake is always an option. Find yourself a good biscuit recipe and make sure to have some biscuits on hand. You can always make them ahead and freeze.

For the cream, I like to use the wire whisk attachment of an immersion or hand blender. I put that, along with a metal bowl, in the freezer first.

Then, take the strawberries and wash them. You won't need to dry them since some of the water on the berries will help to make the juice. Remove the stem, slice, then place into a bowl. Sprinkle with organic sugar (the sugar helps draw out the juices) and allow to sit for 10-15 minutes. You can also mash gently with a potato masher to get some more juice out.

To make the cream, take your favorite organic heavy cream (1/2 cup is a good start; you could always make more) and add 1/2 tsp of vanilla and 2 tsp of organic white sugar and place in the metal bowl. I haven't tried it with agave nectar but if you did want to use it, I would suggest using 1 tsp only. It might make the cream beige-looking, though. Now take the wire whisk and attach to the hand blender and blend all of this at a high speed until you have thick peaks. That means when you pull the beater out, the peak on the cream is stiff and doesn't fall over. You can also taste for sweetness and add more sugar if necessary. Be sure not to overbeat or you will have very sweet butter!

Get ready to serve. Cut the biscuit in half. Spoon strawberries on top of biscuit and top with whipped cream. How easy and how awesome is that?! You can also use angel food cake for something with less fat (but remember, it still has sugar).

My next recipe is a family favorite. I adapted it from my friends Abby and Cesar. I like to call it the crazy shake because it's crazy to put oatmeal in a shake, right? But here it is and it works. This shake actually helped me lose 25 lbs. last year. It's very filling, healthy and delicious. Try it on your kids, too. It might take a while to get used to the oatmeal but it's worth it. Enjoy!

Crazy Strawberry Shake

¼ cup crushed ice
½ cup strawberries, cleaned and destemmed
½ cup non-fat milk
½ cup non-fat plain yogurt
½ cup plain oatmeal (instant or regular)
About 1 tsp of agave nectar
Blend together until smooth. Makes 1 large serving or 2 small servings.
Buy local and support your farmer's market!